L'essentiel des développeurs : manuel
The following are brief list of commonly used adb commands for developers intending to run commands using adb for MuMu Player.
[Common adb commands]
1, adb version
MuMu Player's built-in adb (in the installation directory)
C:\Program Files (x86)\Nemu\vmonitor\bin\adb_server.exe
Download from the website:
① Recommended: http://adbshell.com/downloads
② official Website: https://developer.android.com/studio/releases/platform-tools
2, Connect with device
Open cmd (if using MuMu Player's built-in adb, then cd C:\Program Files (x86)\Nemu\vmonitor\bin\)
adb kill-server (Built-in adb: adb_server.exe kill-server)
Connect to the emulator's port: adb connect 127.0.0.1:7555 (Built-in adb: adb_server.exe connect 127.0.0.1:7555)
List connected devices: adb devices (Built-in adb: adb_server.exe devices), under normal circumstances, you will be prompted that MuMu Player's devices has been connected and you can proceed to the next step.

Remark: If "127.0.0.1:7555 device" does not shown up in the list, keep trying to connect by using adb kill-server and adb connect 127.0.0.1:7555
3, How to operate on MuMu Player with multiple devices connected
Command format: alternative commands for adb -s emulator port, for example: adb -s 127.0.0.1:7555 shell pm list package -3
4, Install and uninstall apk
Run the following commands with the connected MuMu Player:
Install apk
adb install C:\\xx.apk
Uninstall apk adb uninstall C:\\xx.apk
5, List the package names of installed applications
List of all package names
adb shell pm list packages
List of names for all third-party packages
adb shell pm list packages -3
List of system package names
adb shell pm list packages -s
The package names of running applications
adb shell dumpsys window | findstr mCurrentFocus
When running multiple instances of the same application, please check whether the emulator version is earlier than 2.2.2x86/x64, if it is, then the multi-start package name should generally follow the format of original package name + suffix. Taking Honkai Impact 3rd as an example:

If the emulator is newer than 2.2.2x86/x64, then the multi-start package and the original package should have the same name, so you need to control the multi-start application using UserId (don’t forget to first connect the emulator port using adb connect 127.0.0.1:7555)
6, List the Activity ClassName of an installed application
Run adb logcat ActivityManager:I *:s | findstr "cmp" and execute the target application
Taking “Identity V”as an example, you can execute:

where the first cmp=com.netease.dwrg/.Launcher means: Application's package
name/Activity ClassName, the complete Activity
name=com.netease.dwrg.Launcher
7, Start application
adb shell am start -n Application package name/application Activity ClassName
Taking “Identity V”as an example, you can execute:
adb shell am start -n com.netease.dwrg/.Launcher
To view the startup time, execute adb shell am start -W Application package
name/application Activity ClassName
For instance:

8, Close application
adb shell am force-stop Package Name
Taking “Identity V”as an example, you can execute:
adb shell am force-stop com.netease.dwrg
9, View application version
adb shell dumpsys package Package Name | findstr version
Taking “Identity V”as an example, you can execute:

10, Clear application data
adb shell pm clear Package Name
11, Simulated input
Key input
adb shell input keyevent Key value
For example:
adb shell input keyevent 3
means pressing the HOME key (values of other keys can be obtained via online search)
String input
adb shell input text String
For example: adb shell input text test
would return the string "test"
P.S.: Chinese characters are not supported
Mouse click
adb shell input tap X Y
where X and Y are the x and y coordinate values of the current input
Mouse movement
adb shell input swipe X1 Y1 X2 Y2
X1 Y1 and X2 Y2 are the coordinate values of the start and end points respectively
12, Upload files from the computer to the emulator
adb push C:\test.apk /data
13, Copy files from the emulator to the computer
adb pull /data/test.apk C:\
14, Take screenshots
Take a screenshot of the current emulator screen
adb shell screencap /data/screen.png
Save the screenshot to the computer
adb pull /data/screen.png C:\
15, Record screen
Initiate recording
adb shell screenrecord /data/test.mp4
Stop recording
CTRL+C
Export video file
adb pull /data/test.mp4 C:\
16, View device information
Model
adb shell getprop ro.product.model
Brand
adb shell getprop ro.product.brand
Processor model
adb shell getprop ro.product.board
Android version
adb shell getprop ro.build.version.release
Engine rendering mode
adb shell dumpsys SurfaceFlinger|findstr "GLES"
This command can't be used in version 2.0.30 and above. For now, using it requires an older version.
For other commands, please visit http://adbshell.com/commands
[How to capture packages]
1) Download the latest version of "fiddler" and "MuMu Player" respectively;
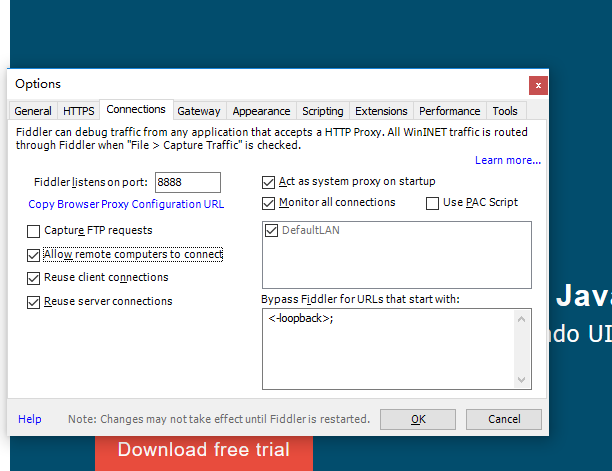
2) Start fiddler via Tools -> Options -> Connections, check "Allow remote computers to connect" and restart the program. Important! Don't forget to restart;
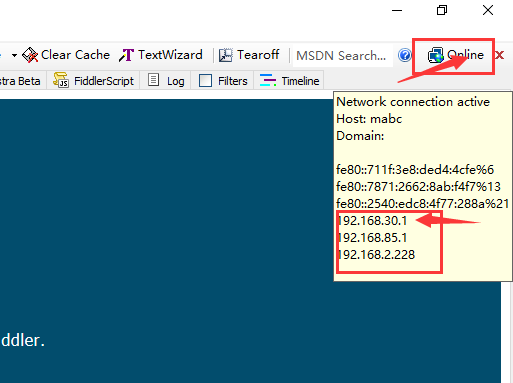
3) Check the IP. If there is a virtual network card, you need to execute ipconfig/all to check the real IP;
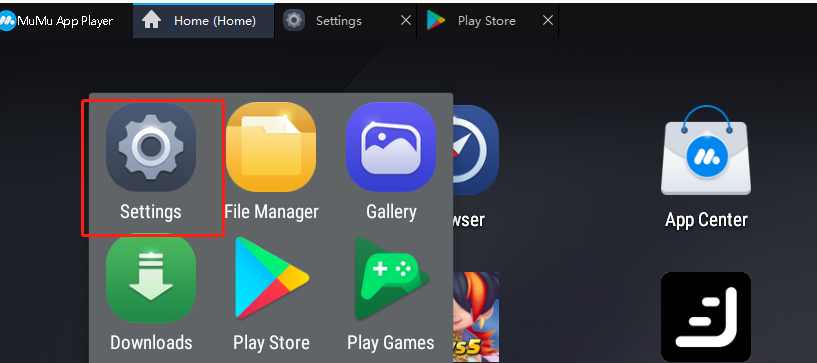
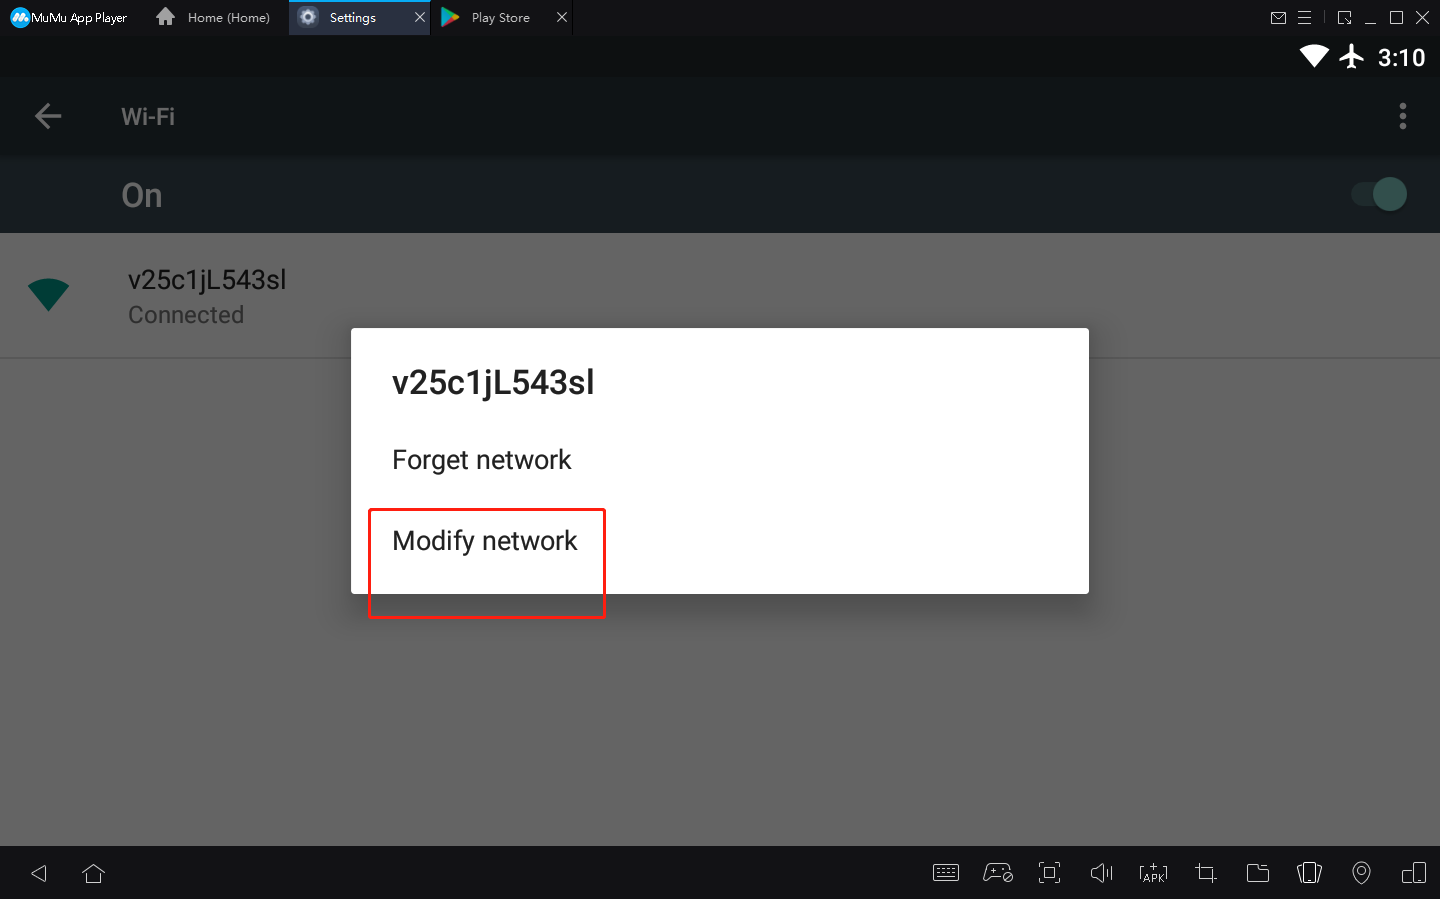
4) Start the MuMu Player and configure the proxy;
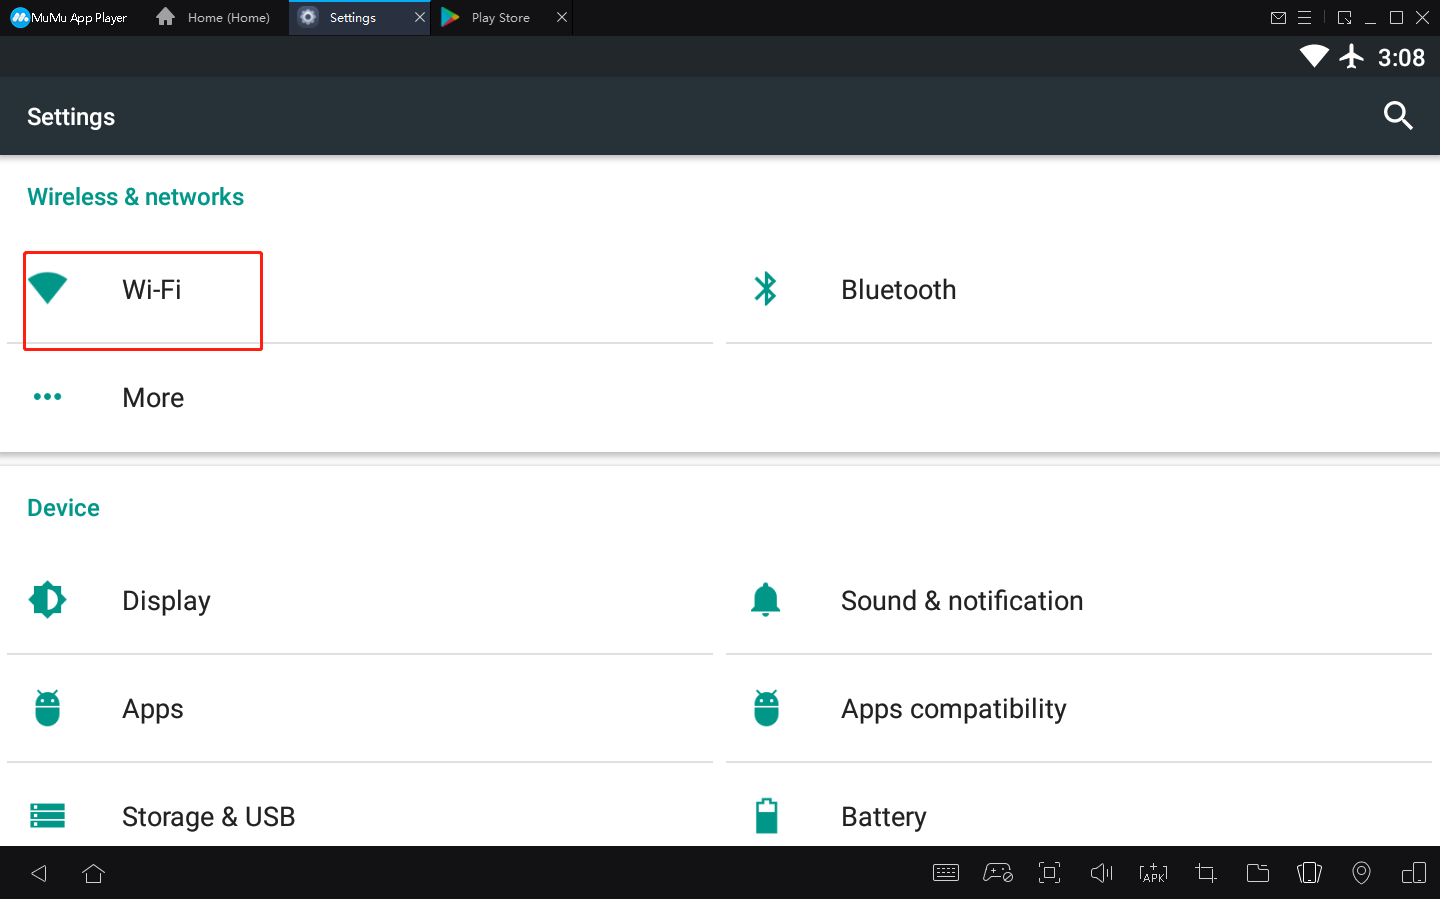
Long press the WiFi name and click "Modify network"
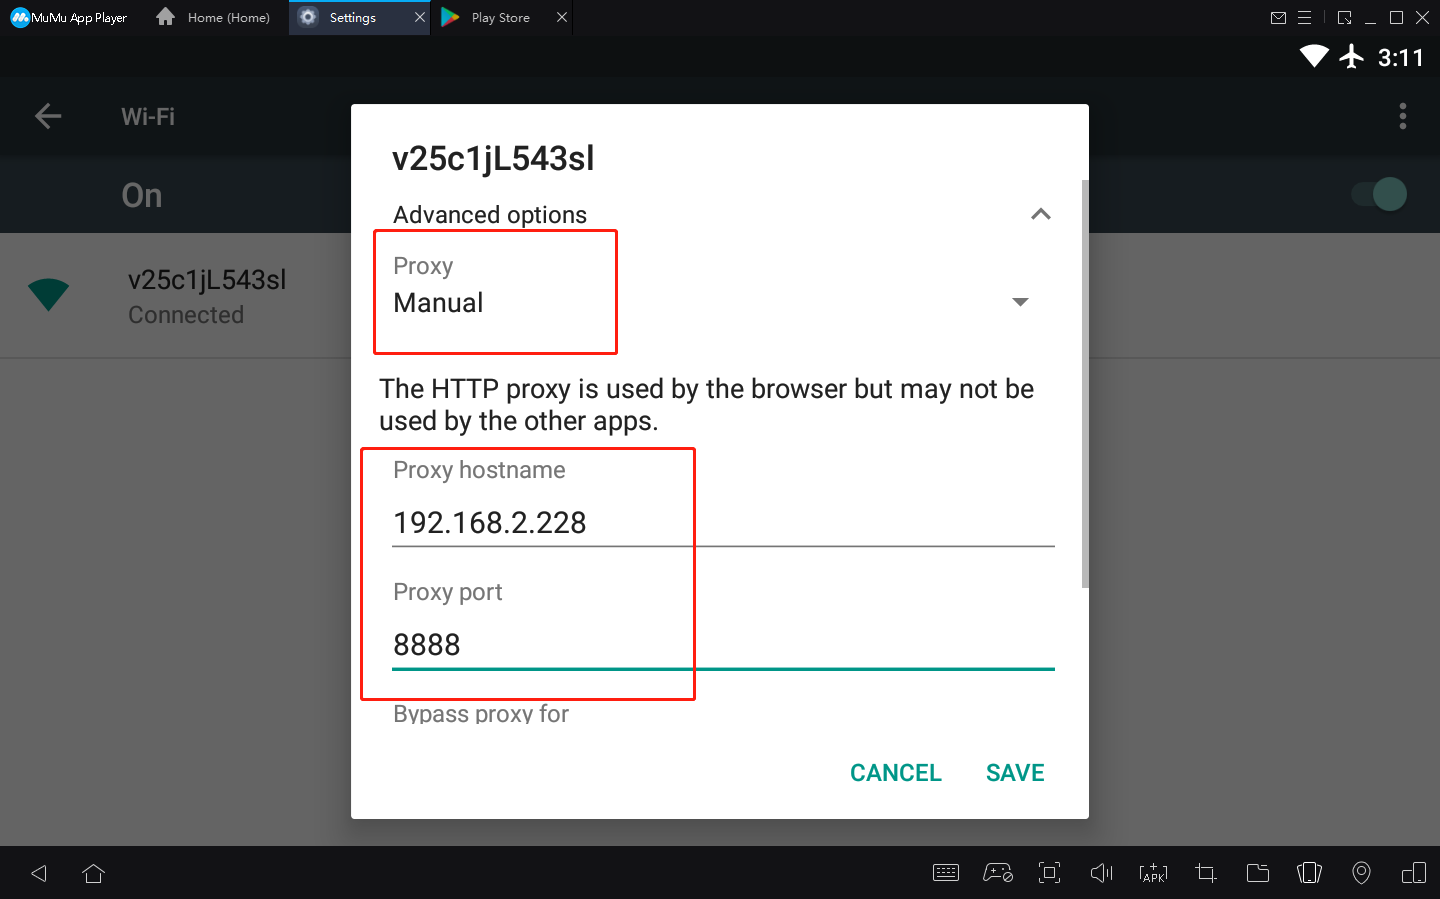
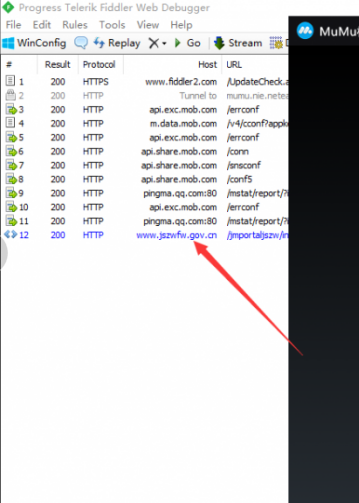
5) Save and proceed to the next operation.
Fin de l'article
