How to customize your own Device Storage Directory?
When you don't have enough space on your Mac device for your MuMuPlayer for Mac, what should you do? Don't worry! MuMuPlayer for Mac has introduced a new feature that allows you to customize your own Device Storage Directory. This way, the issue of insufficient storage space can be easily resolved!
*Please update to the latest version to use this feature.
1. Overview
MuMuPlayer for Mac will set a default Device Storage Directory, where the data of newly created or cloned Android Devices is stored.
In our newly released version, you can change the default Device Storage Directory to a customized one. The Android Devices you create or clone afterward can be stored in this customized directory. You can decide where to store your data.
Meanwhile, to avoid being unable to use an already created Android Device when there is an error with your customized directory, MuMuPlayer for Mac allows you to "Add from .gmad file". This ".gmad" file is the data file for an individual Android device. As long as you have this file, you can add your Android Device to the list.
*Note: To "Add" a device is not the same as to "Clone" the Android Device. Even if you have added the device to your list, the Android Device is still stored where the .gmad file is located. And its data will be stored and updated synchronously when you run this device.
2. User Interface
Function 1: Device Storage Directory
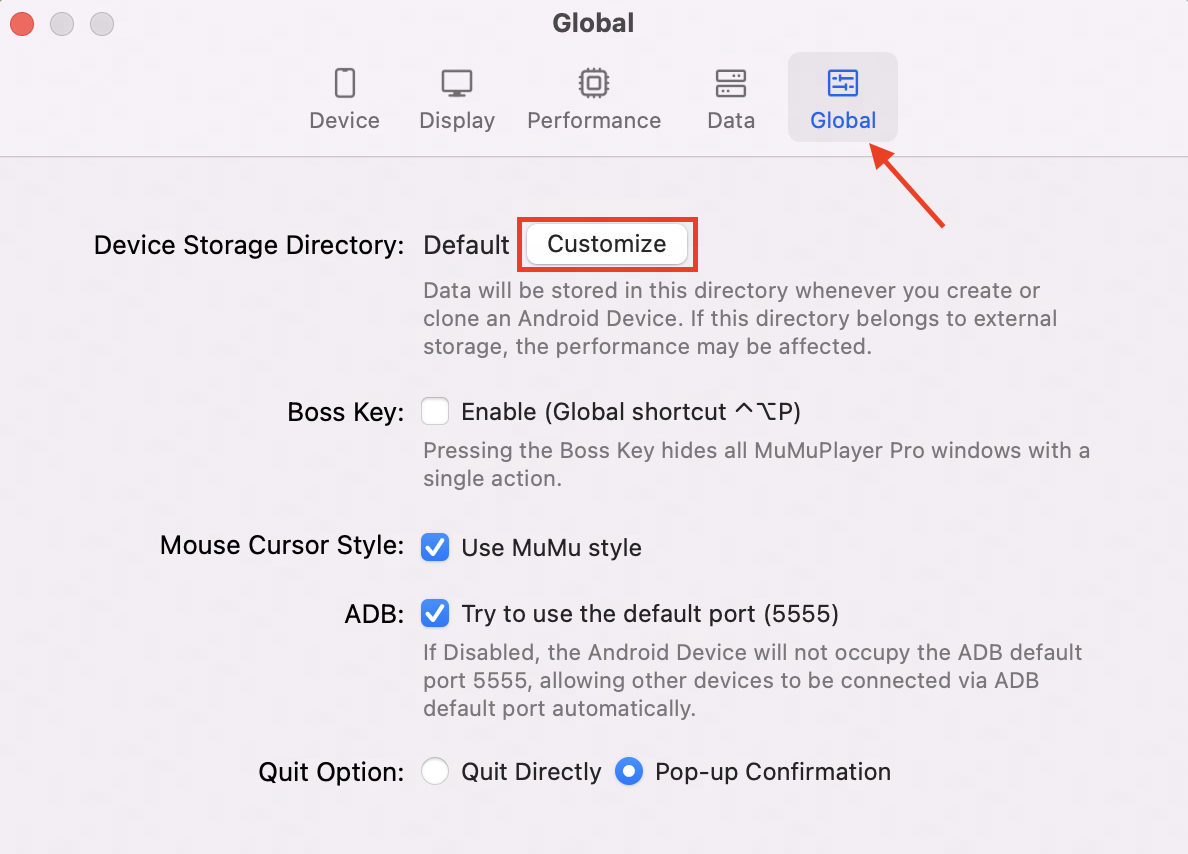
Open the "Settings" of an Android Device, click on the "Global" tab and find "Device Storage Directory"; When the directory is in the default location, you can "Customize" it. Click on the "Customize" button to open the window for choosing a location, and you can choose the directory you want.
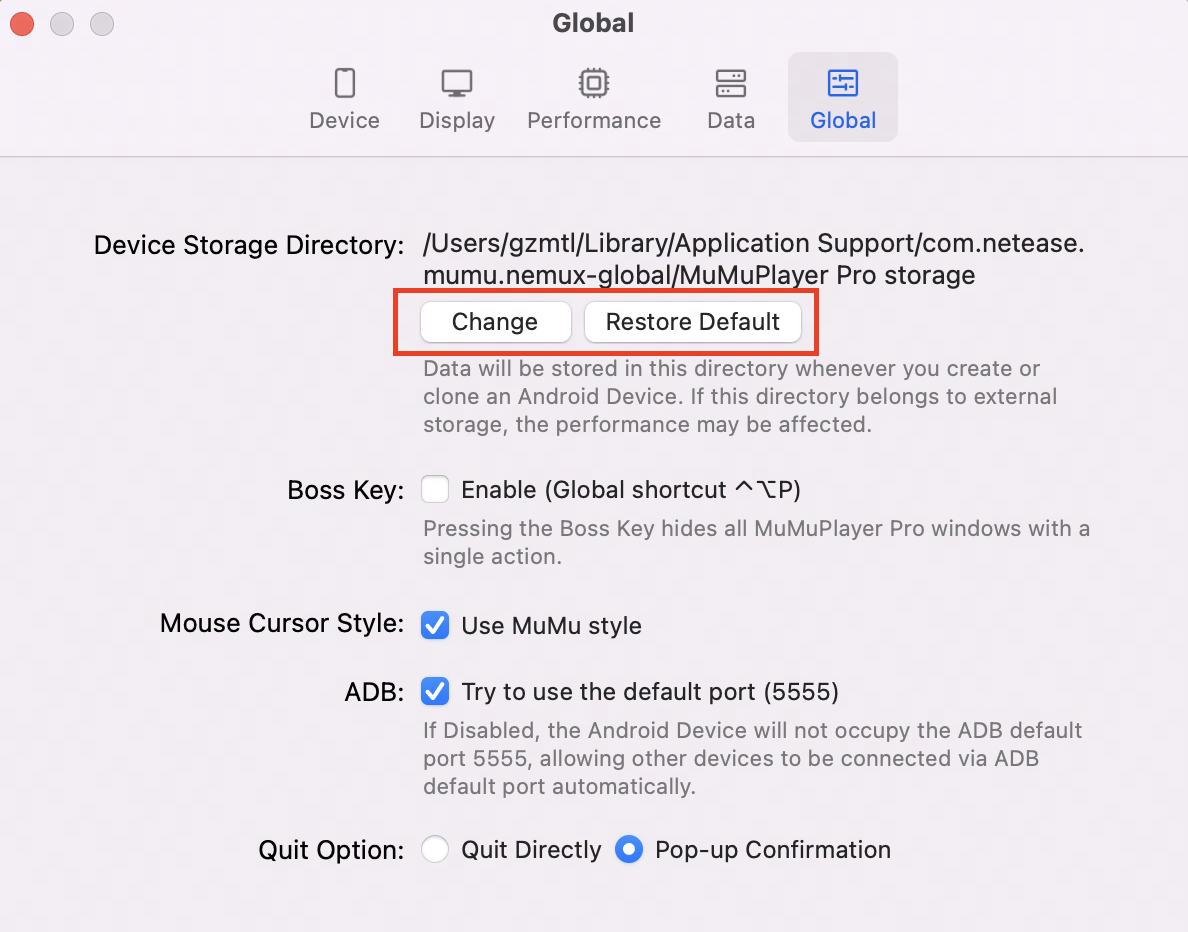
When the directory is customized, the specific path will be displayed. You can choose to "Change" it or "Restore Default". "Change" has the same function as "Customize", and "Restore Default" will set your storage directory back to default.
Function 2: Device Storage
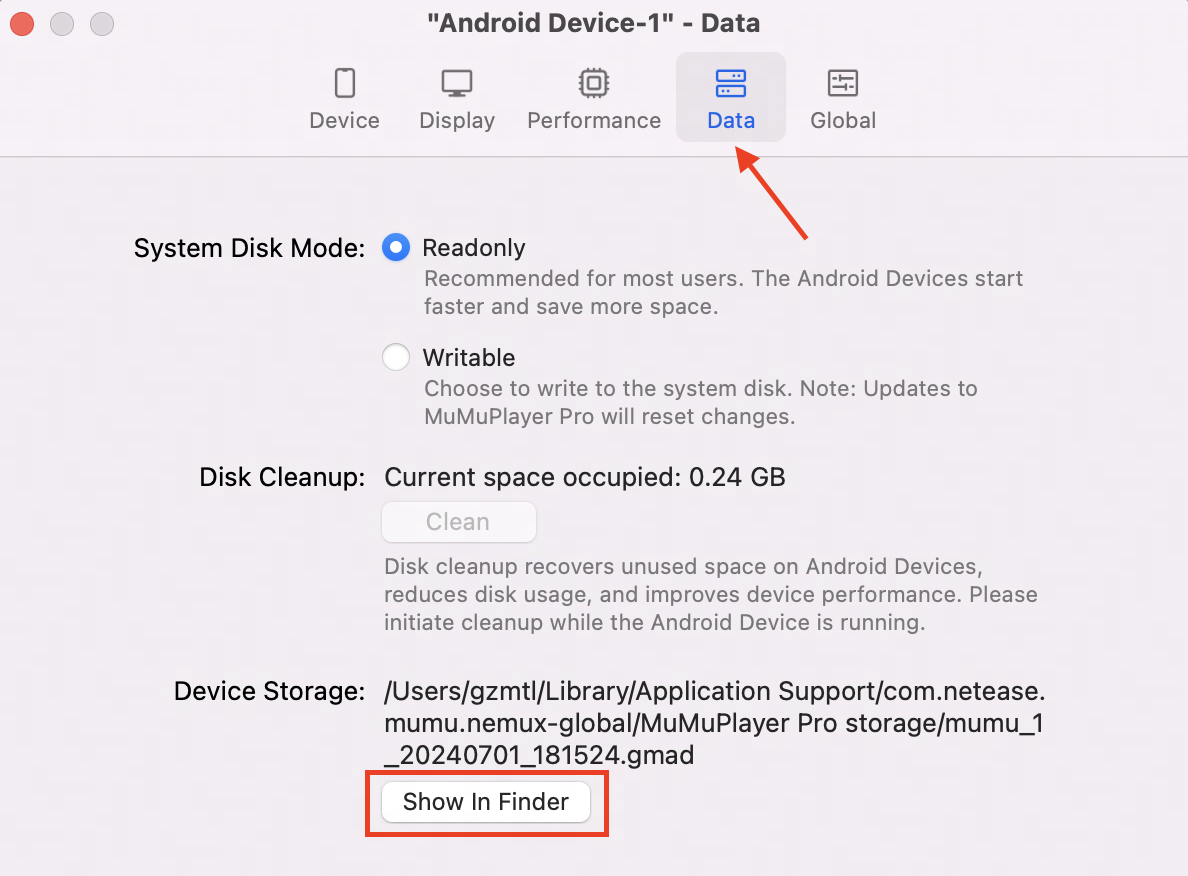
If you want to check where a certain Android Device stores its data, you can open the "Settings" of this device and find "Data-Device Storage" to view the location of your storage directory. You can also click on "Show in Finder" to locate your file.

Function 3: Add from .gmad file
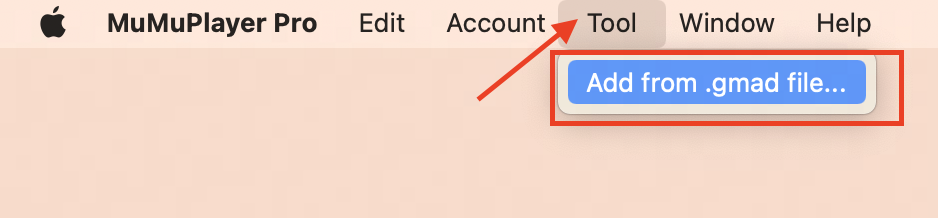
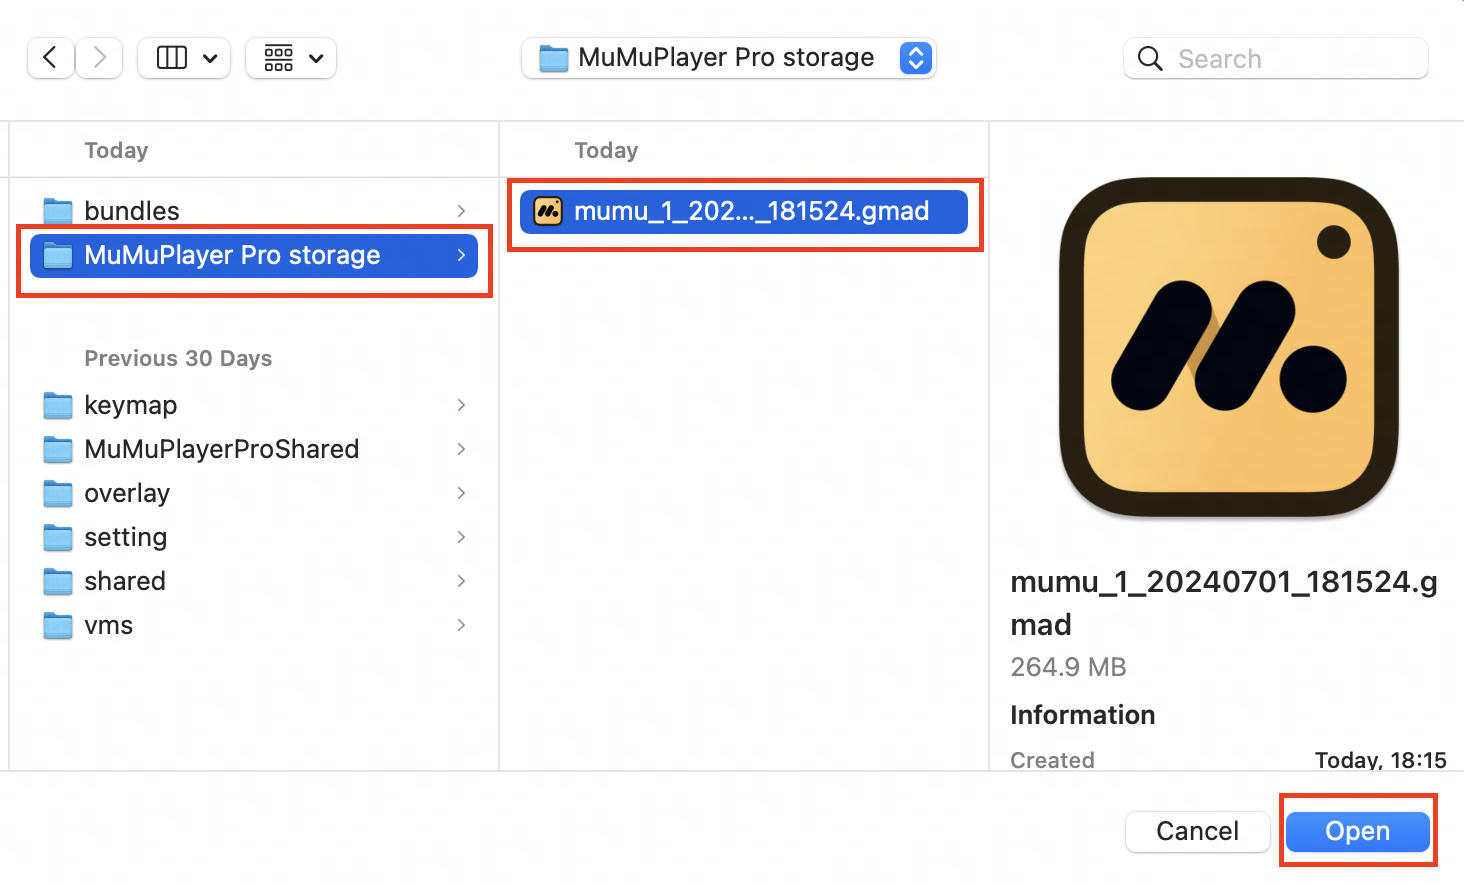
Open the main interface of MuMuPlayer for Mac and click on the top menu bar "Tool-Add from .gmad file...". When you find the .gmad file, select an individual one or multiple ones and add it/them to the list of Android Devices.


3. Best scenarios and instructions
Scenario 1: Previously the data in MuMuPlayer for Mac was stored in the default directory and I want to move it to another directory (e.g. in an external hard drive)
Instruction: The method of data migration is suitable not only when the original directory is in the default setting, but also when the original directory is customized.
1. If your Android Device is in an old file format (Open "Settings-Data". If there's no "Device Storage", then it's an old format), then you can follow the steps below:
(1) Open "Settings" of an Android Device, click on the "Global" tab and find "Device Storage Directory"; then click "Customize";

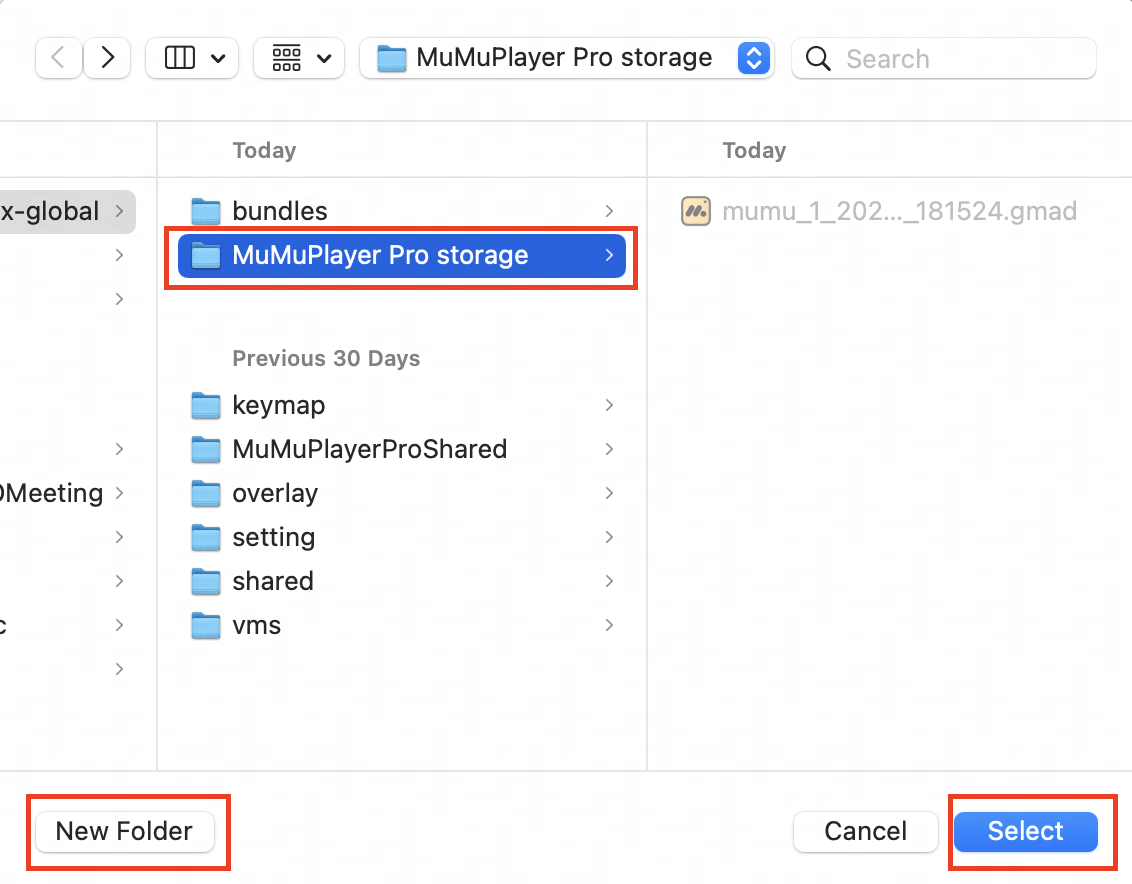
(2) Open the window for choosing a directory, select "New Folder" or find a folder you would like to use, then click on "Select" to finish the directory settings;
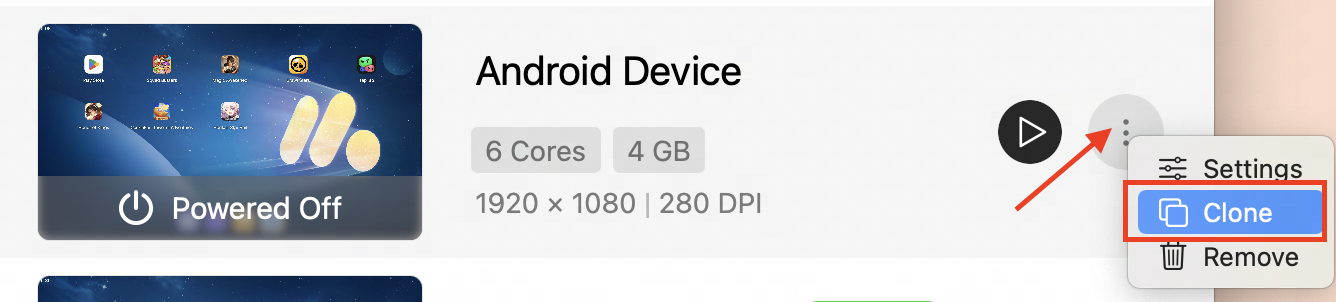
(3) Then you can clone the Android Device that you want to migrate. You can also delete the original one if you want. The whole process of data migration is done.
2. If your Android Device uses the new file format ".gmad" (Open "Settings-Data" and you will see a path for "Device Storage"), then besides the methods above, you can also do the following:
(1) Find the Android Device you want to migrate, open "Settings-Data-Device Storage", and then click "Show in Finder";
(2) Then copy and paste the gmad file into the directory you want to use. Click "Tool-Add from .gmad file..." in the top menu bar. When you find the corresponding .gmad file, you can add it to your Android Device list;
(3) The entire data migration process is complete. You can also delete the original one if you wish.
Scenario 2: I'm new to MuMuPlayer for Mac and I want to customize my own Device Storage Directory.
Instructions:
(1) Open "Settings" of an Android Device, click the "Global" tab and find "Device Storage Directory"; then click "Customize";

(2) Select "New Folder" or find a folder you would like to use, then click on "Select" to complete the directory settings;

Scenario 3: I want to store my Android Devices in different directories.
Instruction: You can refer to Scenario 1 and migrate your Android Devices to different directories.
Scenario 4: I want to take my data with me and use it on different Mac devices.
Instruction:
(1) You can refer to Scenario 1, and migrate all your data to your external hard drive;
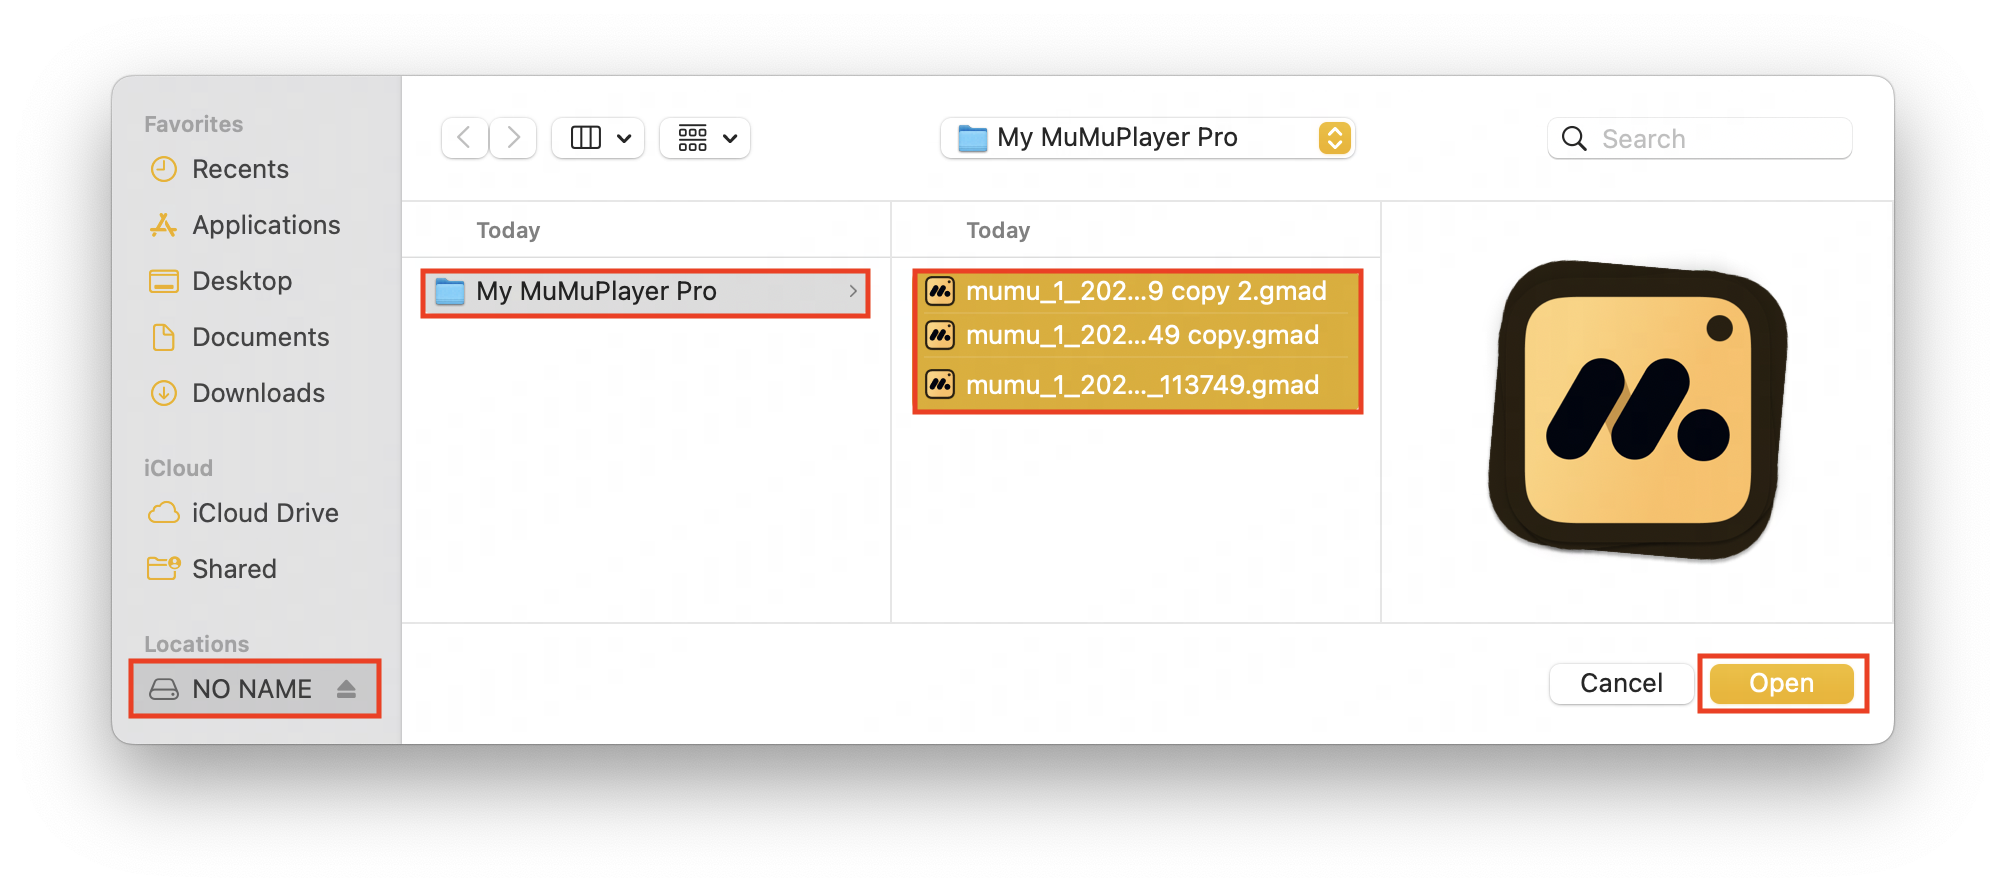
(2) On your different Mac devices where MuMuPlayer for Mac needs to run, you can click "Tool-Add from .gmad file..." in the top menu bar, and add all the .gmad files.

(3) Keep your external hard drive connected, and then you can run your Android Devices;
(4) If you need to remove your external hard drive, we strongly recommend you do so after exiting MuMuPlayer for Mac, to avoid data loss.
When you are customizing your storage directory, you might encounter errors.
In this case, please refer to the article "What to do if there is an error with your Android Device Storage Directory?". If this article cannot solve your problem, please contact us for help.End of Article