For any issues, feel free to join our Discord community and consult with our official support team for assistance.
How to run multi-instance?
Aug 31, 2024
MuMuPlayer for Mac supports simultaneous operation of multiple devices, allowing you to run several games/apps at the same time! For multi-instance requirements, we provide the following features.
1. Create and Run a Device
On the main interface's top-right corner, click "+" to create a tablet device or a phone device.
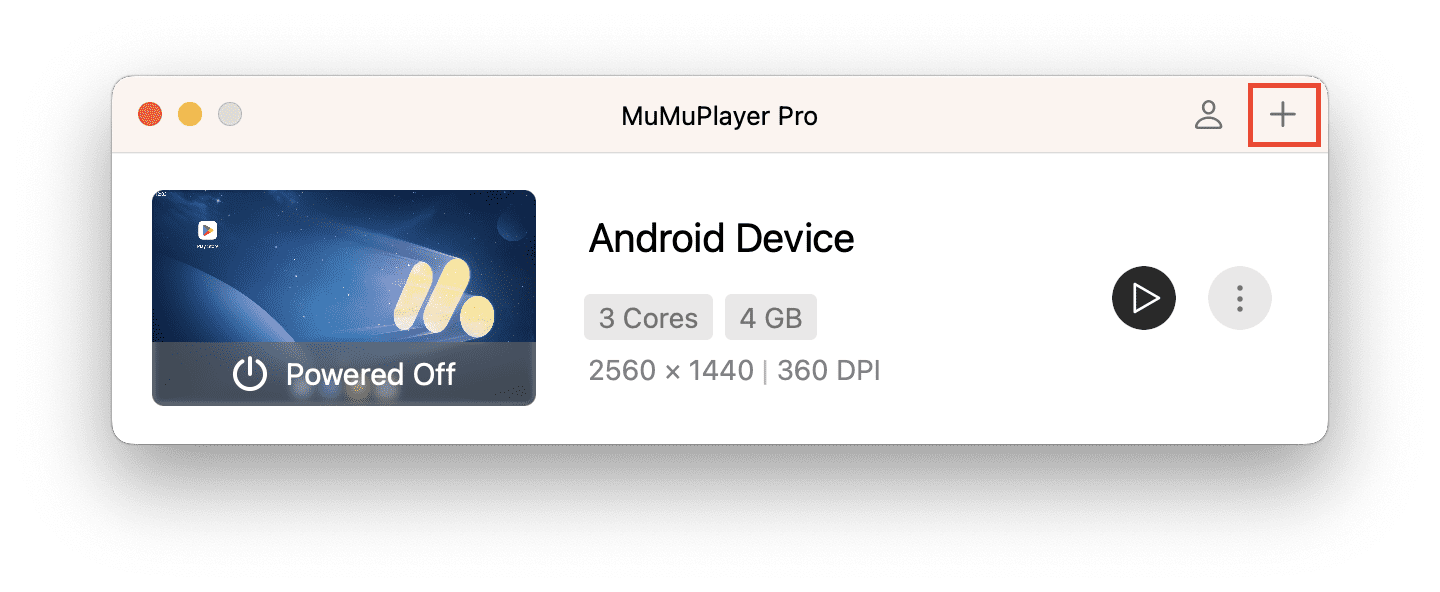
Once created, the device will appear in the list. There are three ways to start the device: Double-click the list / click the run thumbnail / click the launch button.
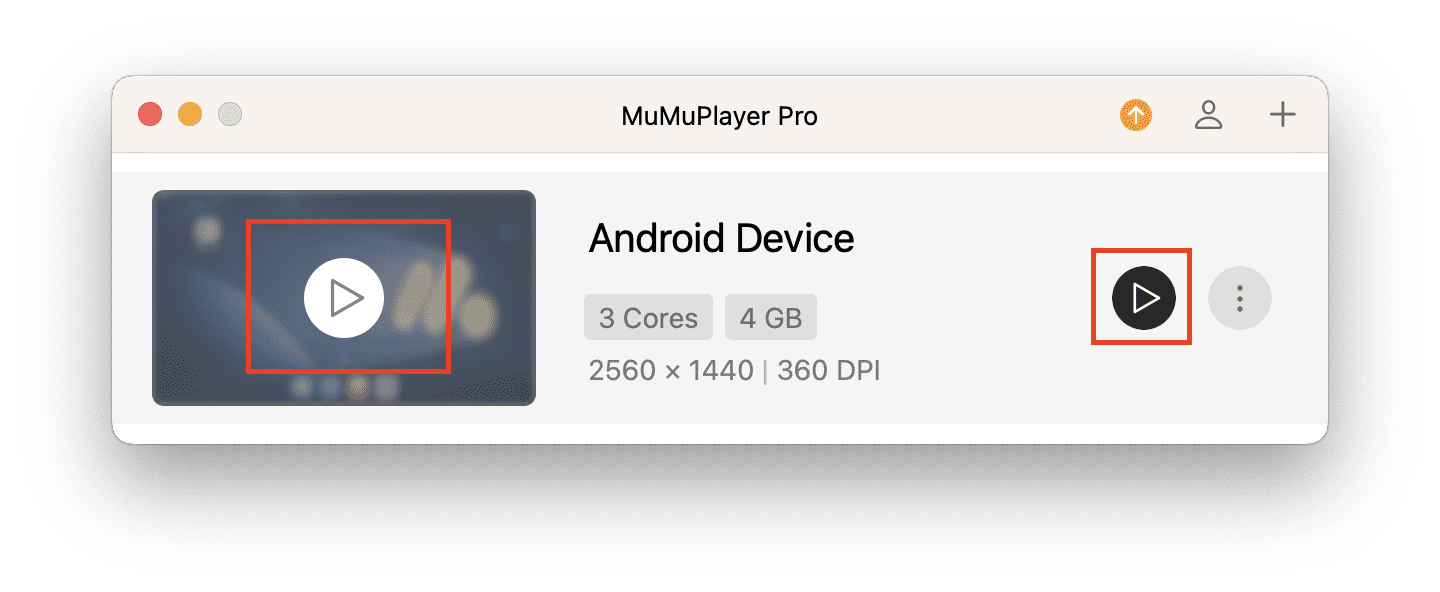
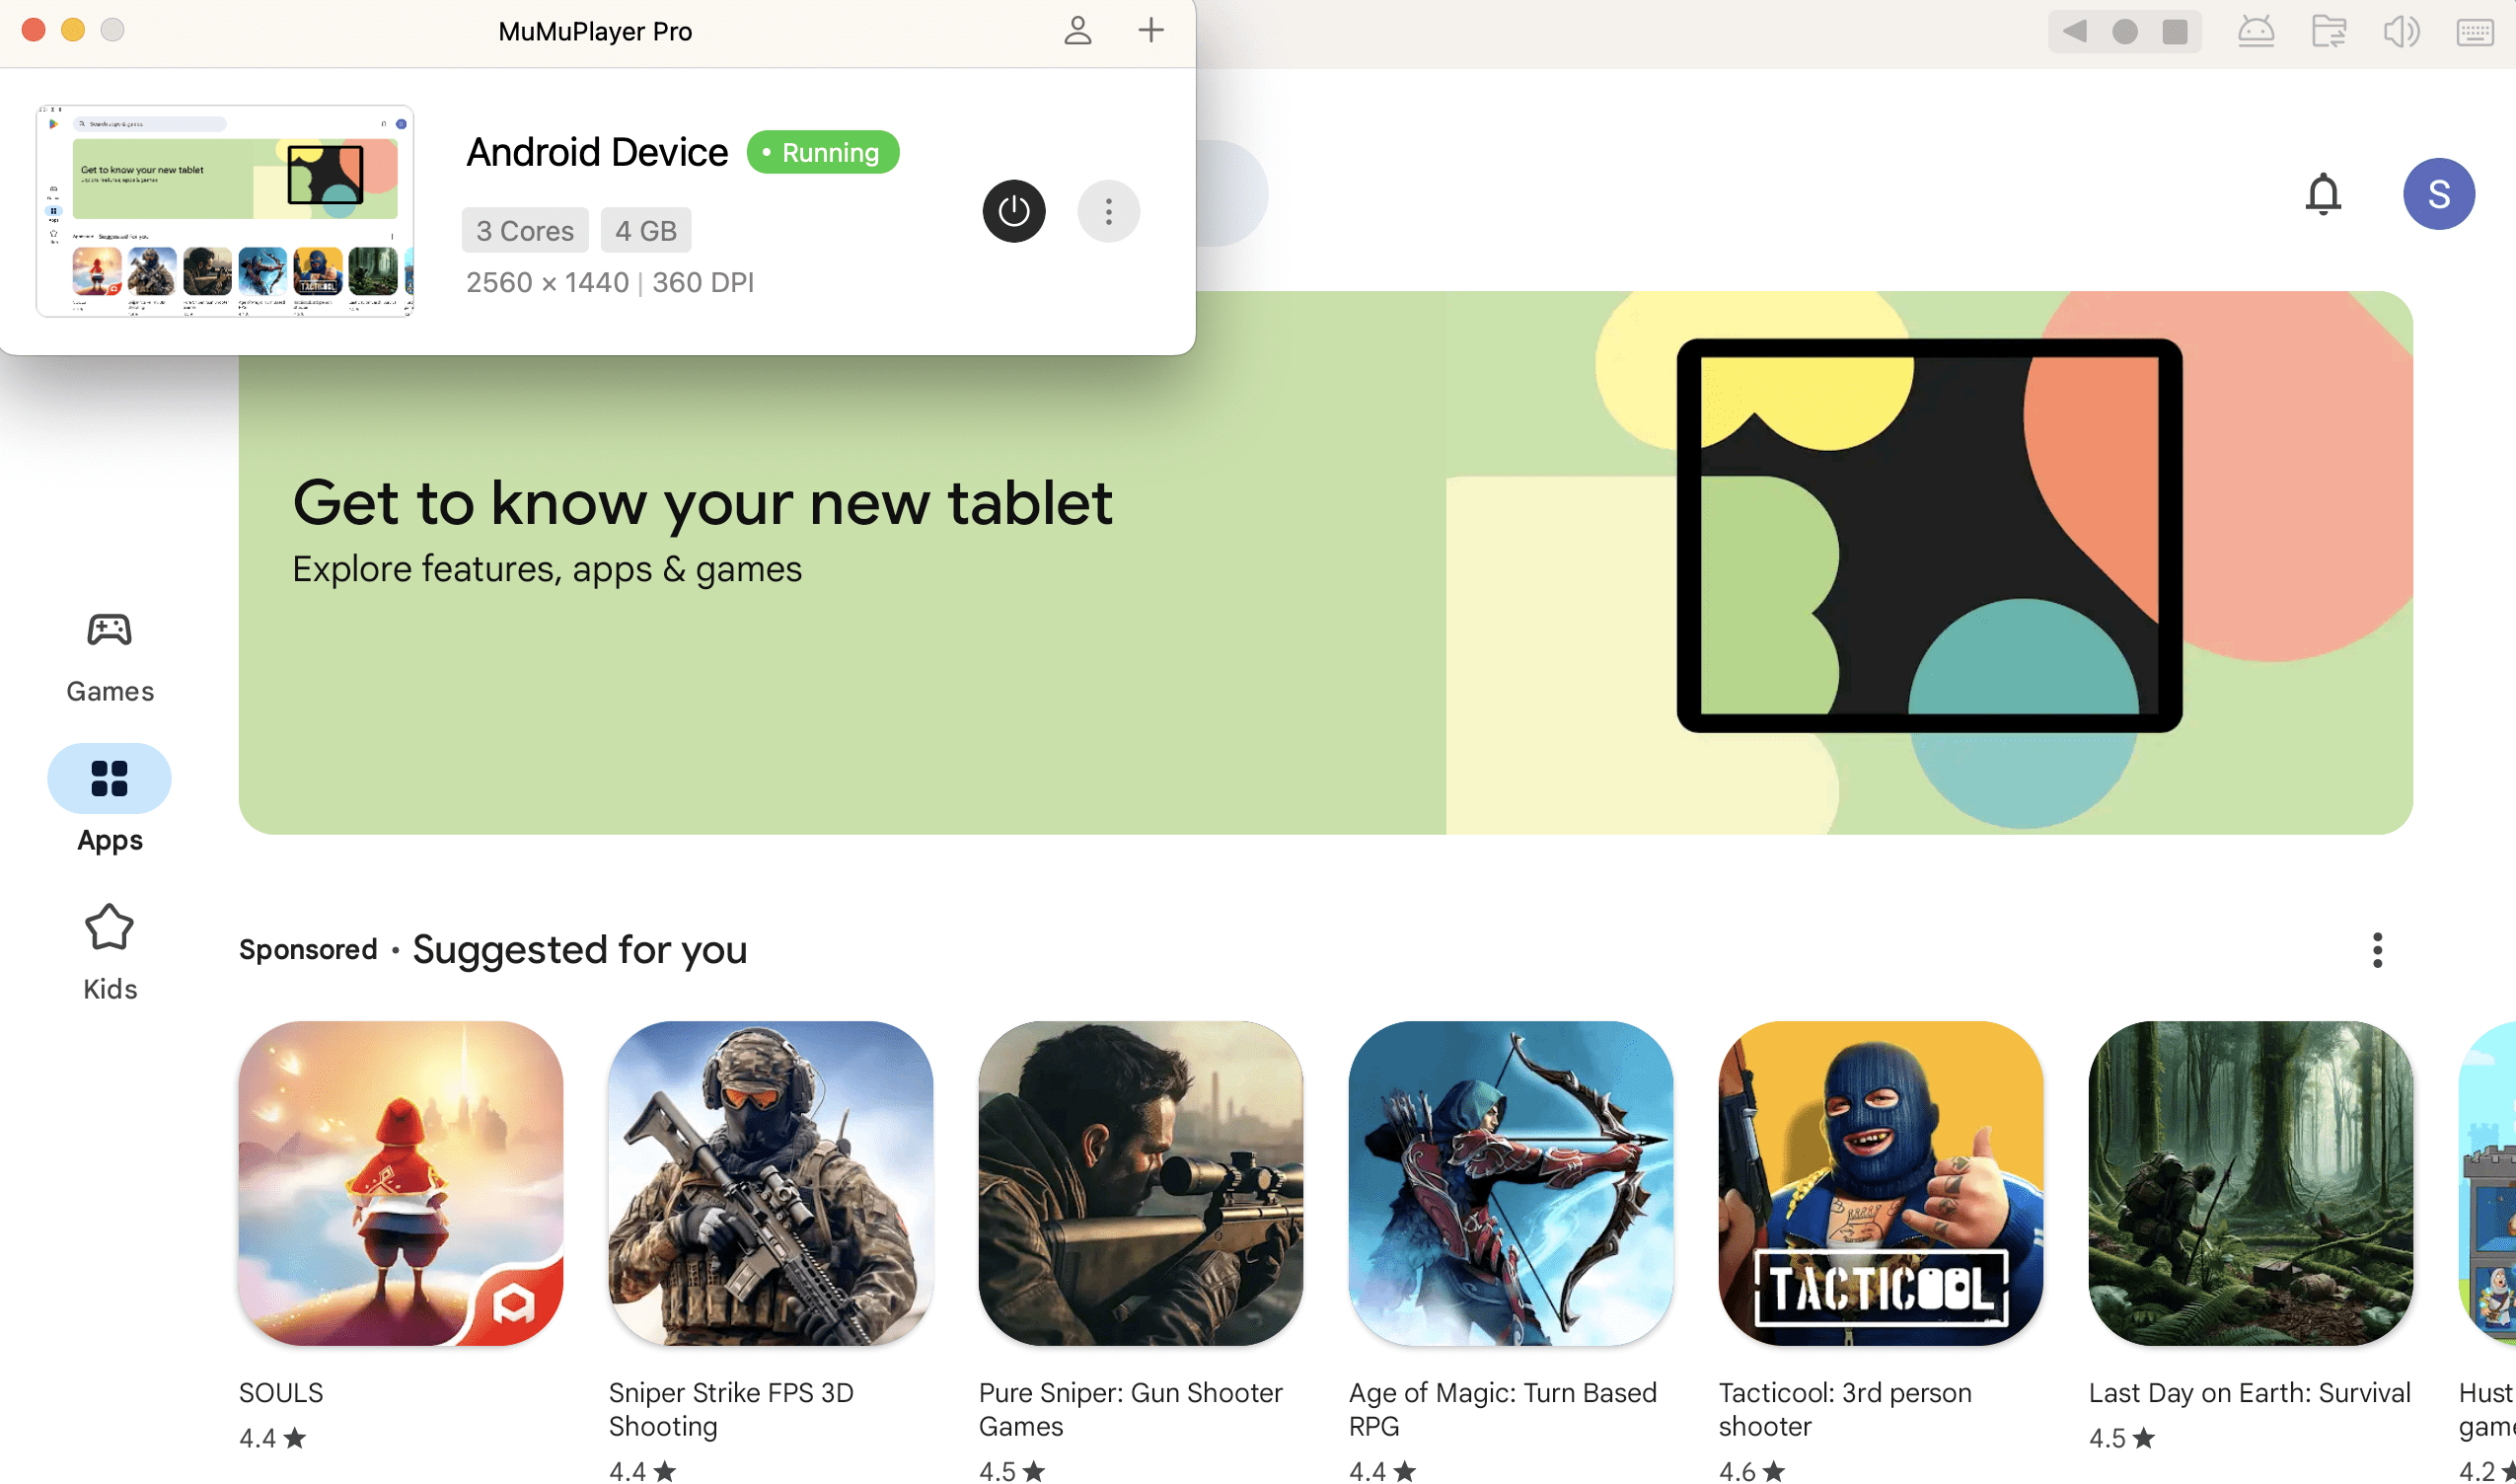
While the device is running, you can see the running thumbnail update in real time, just like a live streaming window for games!
Clicking on this small window can also bring the running Android device to the foreground, making it easy for you to quickly locate the corresponding Android device.
2. Modify Device Settings
After obtaining a virtual Android device, you may want to rename it. Click "Settings" to change the device name, which will also update at the top of the device window for easy identification.
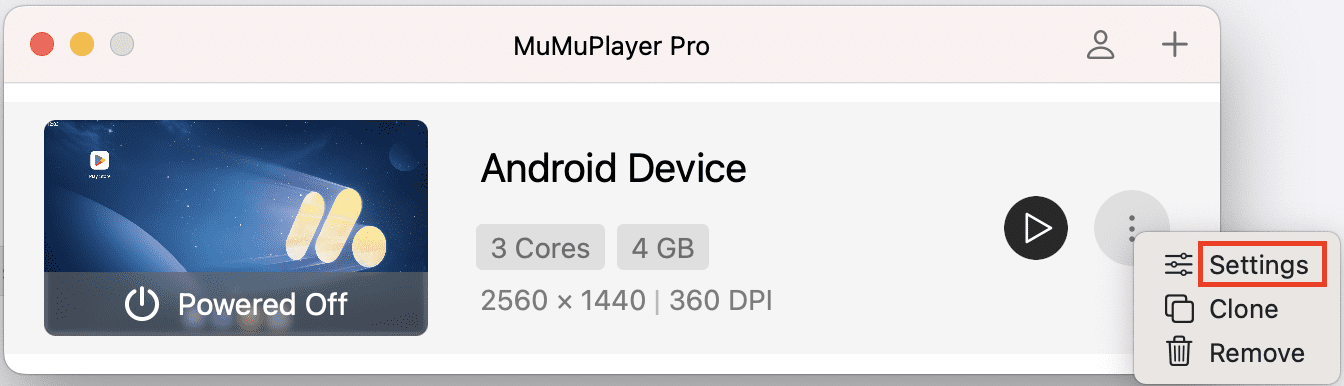
You can also modify device settings as needed, including aspects such as the device, display, performance, data, and global.
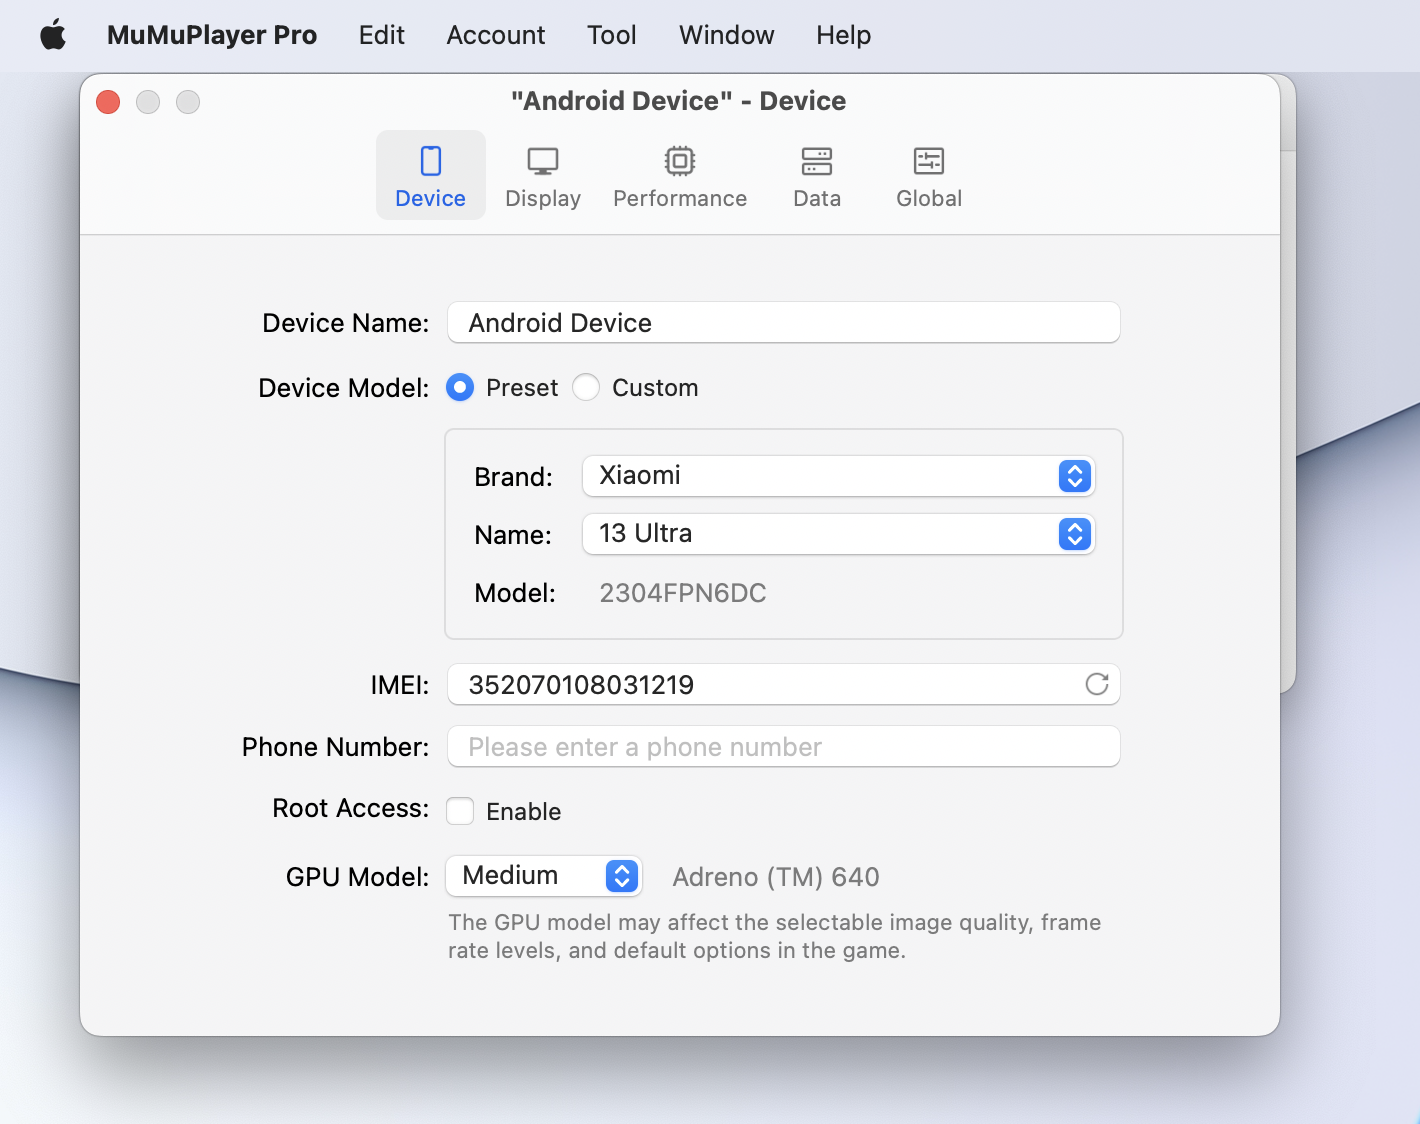
(1) Device
① Device Model: Some games are optimized to run better on certain phone models. In such cases, you can simulate the environment by setting the phone model. We provide some common phone models, and you can also customize the settings by clicking "Custom".
② IMEI/Phone Number: Mainly for developers simulating device requirements.
③ System Disk Mode: Choose between "Readonly" and "Writable"; the former generally ensures better performance for multi-instances.
④ GPU Model: Choose the default options for High/Medium/Low, or customize it. This setting item may affect the effects of selectable image quality, frame rate level, default options, etc. within the game.
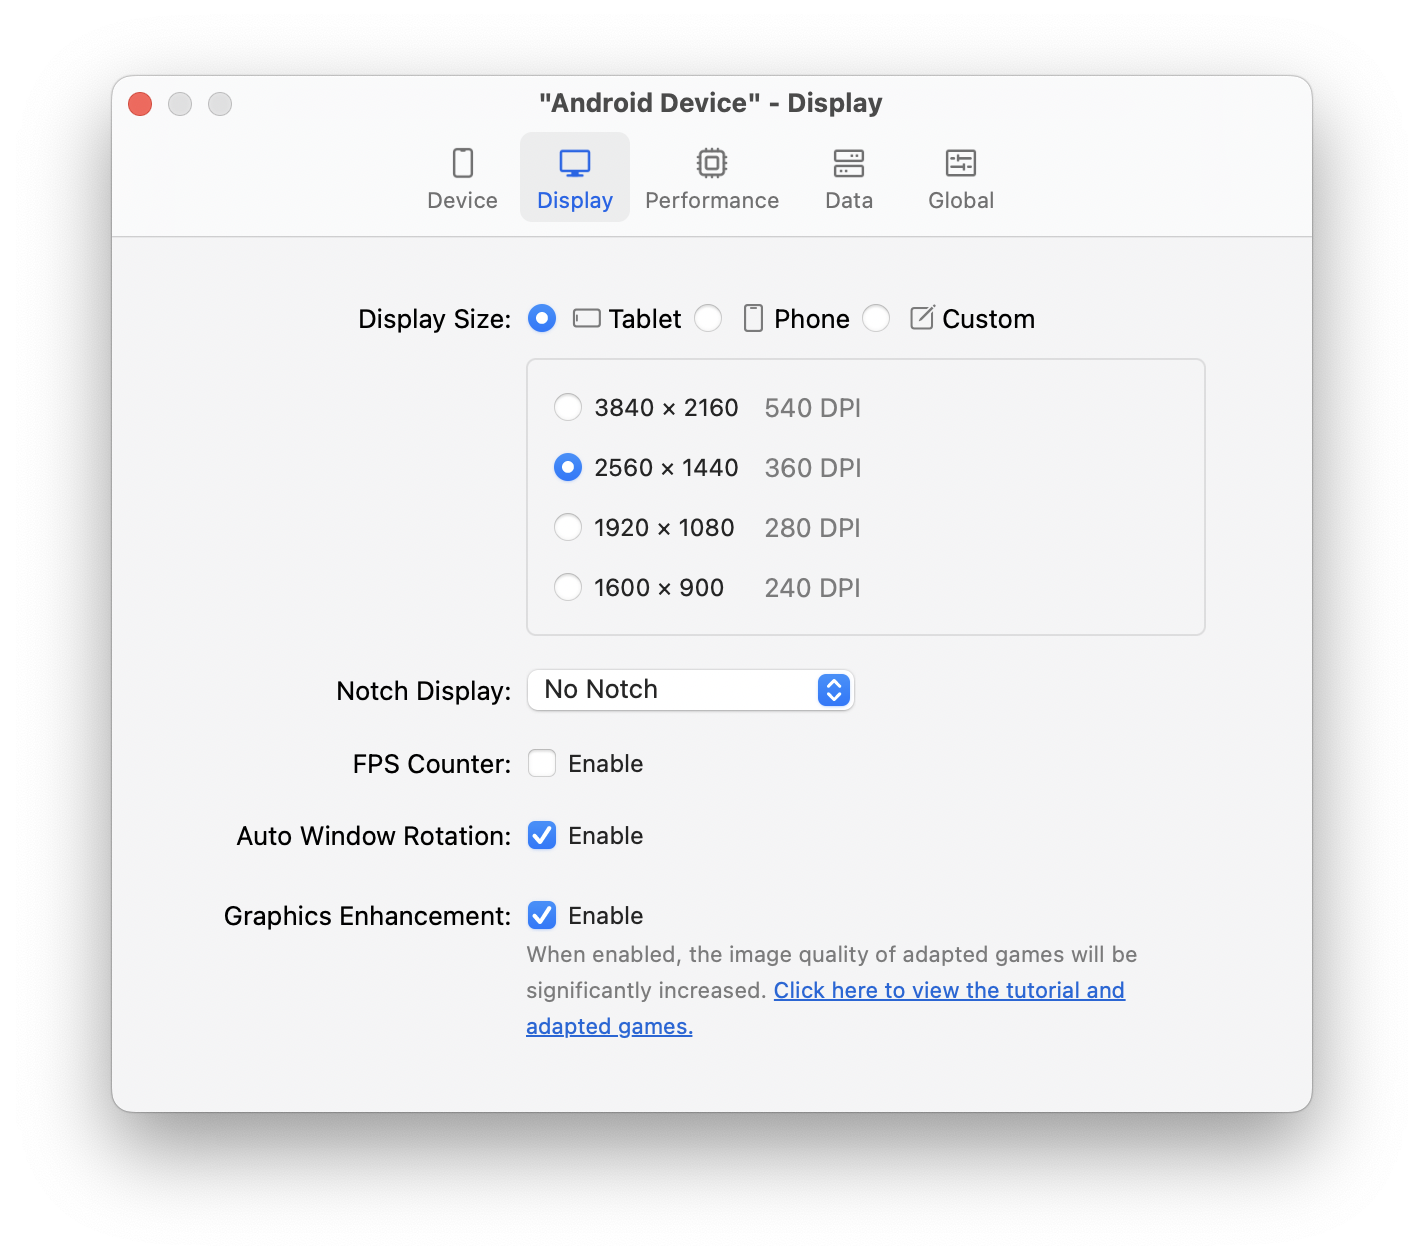
(2) Display
① Display Size: This refers to the size of the Android device, including resolution and DPI settings. We provide default resolution options for tablets and phones based on your display screen, with a 16:9 aspect ratio. You can also customize the width, height, and DPI for other resolution requirements, such as running scripts.
② Notch Display: Mostly used in application development scenarios, the page can be customized to display as no Notch/center punch hole/top left punch hole/top right punch hole/center notch/teardrop.
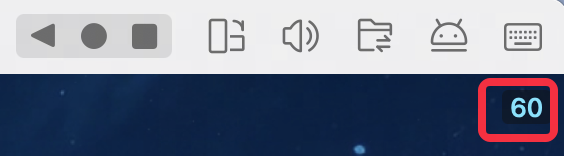
③ FPS Counter: After enabling "FPS Counter", the current frame rate will be shown in the top right corner of the Android device window.
④ Auto Window Rotation: After enabling "Auto Window Rotation", the device window will adapt to landscape or portrait display based on the game/application orientation.
⑤ Graphics Enhancement: The image quality of adapted games will be significantly increased.
(3) Performance
① Performance Profile: This represents the computer resources allocated to the Android device. For high-performance games, select high performance or customize CPU cores and memory allocation.
② GPU Fast Math: It can reduce GPU usage but may cause display issues in high-performance demanding games.
③ Dynamic Frame Rate: It can reduce frame rate to 5/15/30 FPS when the Android window is in the background, thereby conserving resources.

(4) Data
① System Disk Model: Choose “Randonly” or “Writable”. In general, you can choose “Randomly” to get better performance when opening multiple instances.
② Disk Cleanup: After uninstalling the apps installed in the emulator, you can free up space on your Android device by using the disk cleanup here. Disk cleanup needs to be performed while your Android device is running, so please start the emulator first and then click on cleanup.
③ Device Storage: Click “Show in Finder” to locate the .mad file of the Android device. You can see the tutorial here.
(5) Global
Global refers to settings that take effect for all Android devices, including the following features:
① Device Storage Directory: Customize the data storage path when creating and copying Android devices. You can use the local storage path or an external storage path. For specific usage, refer to the tutorial here.
② Boss Key: Instantly hide all application windows when needed, leaving no trace of your gaming.
③ Mouse Cursor Style: Use MuMu style to easily locate the mouse in complex game graphics.
④ ADB: You can decide whether to use the default port or not.
⑤ Quit Option: When closing the Android device window using the 'X' in the top left corner, a secondary confirmation popup will appear by default to prevent accidental closure.
To disable this secondary confirmation popup, you can change "Pop-up Confirmation" to "Quit Directly".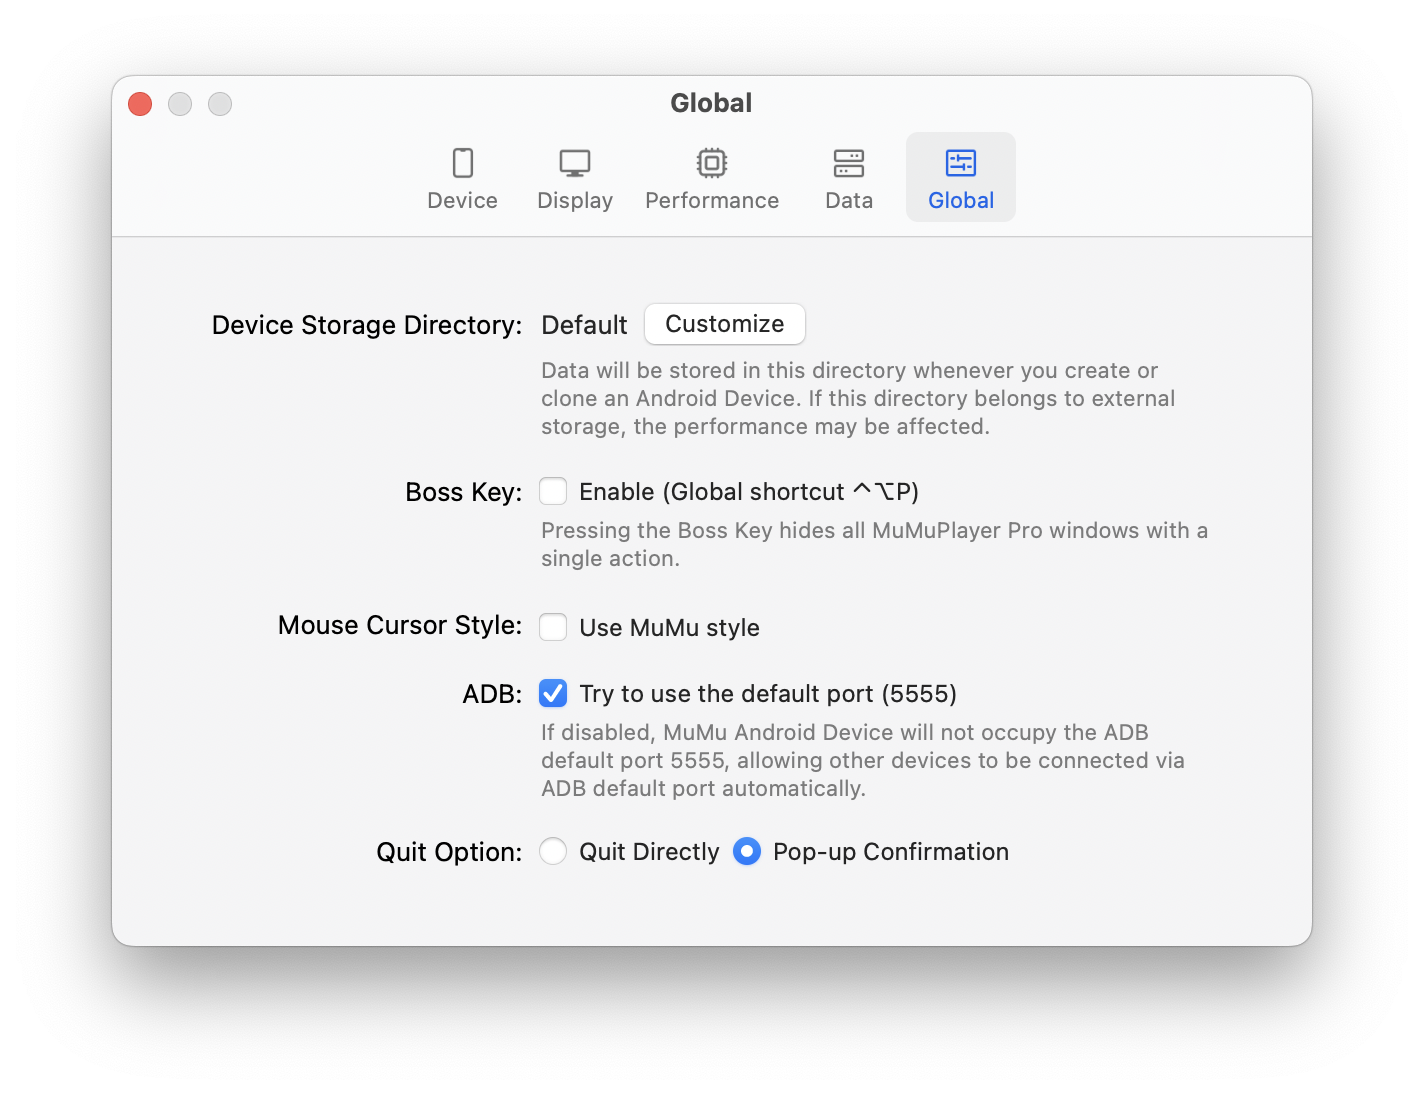
3. Copy an Android Device
To clone a device with the same settings and data, click "Clone".
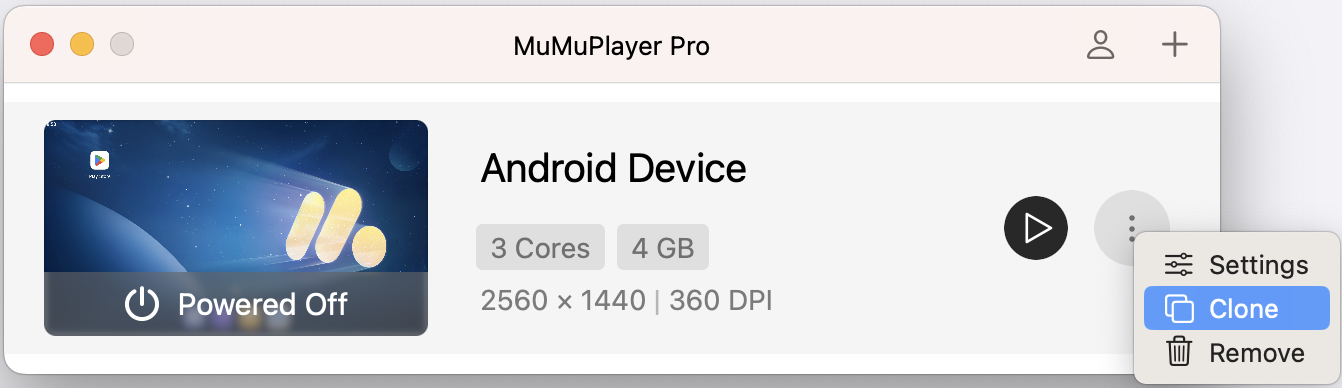
4. Remove an Android Device
You can remove an unnecessary Android device and all its data by clicking "Remove".

End of Article
Keyword: