Disable Hyper-V and turn off core isolation
The technologies used by Microsoft's "Core Isolation" and "Hyper-V/VBS" conflict with MuMu Player 12, causing the emulator to run inefficiently or not run at all. It is recommended to turn off "Core Isolation" and disable "Hyper-V/VBS" when running MuMu Player 12. Turning off core isolation will not affect security. If you are concerned, you can install other security software. You can turn off core isolation and Hyper-V/VBS by following the steps below:
1. Turn off core isolation
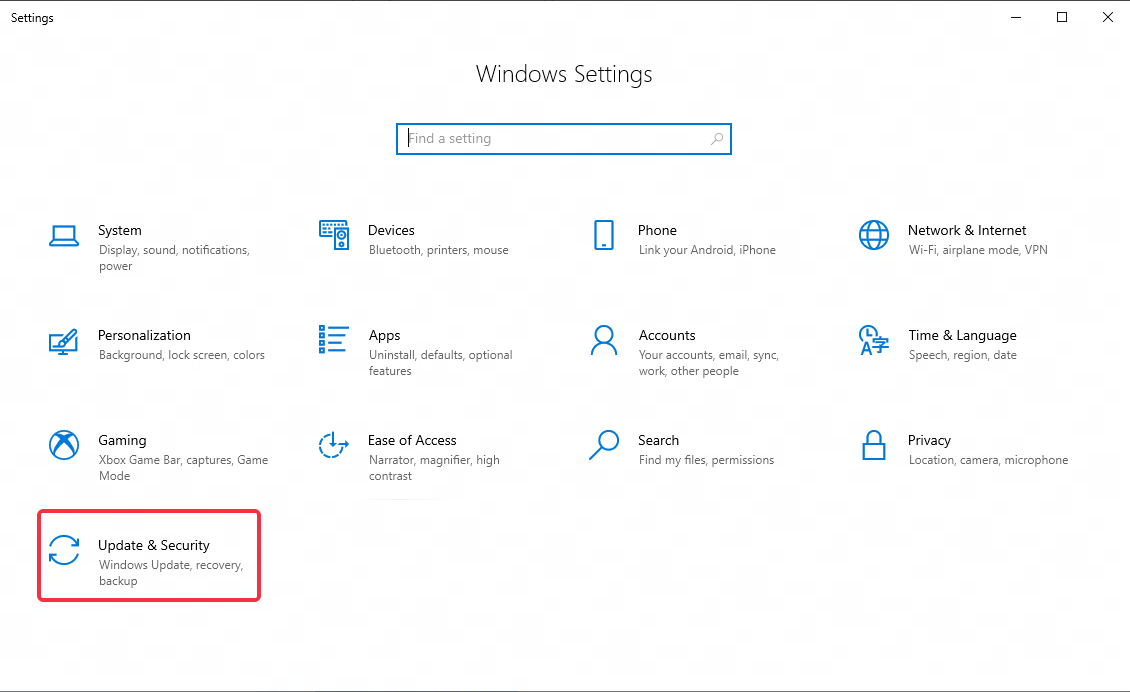
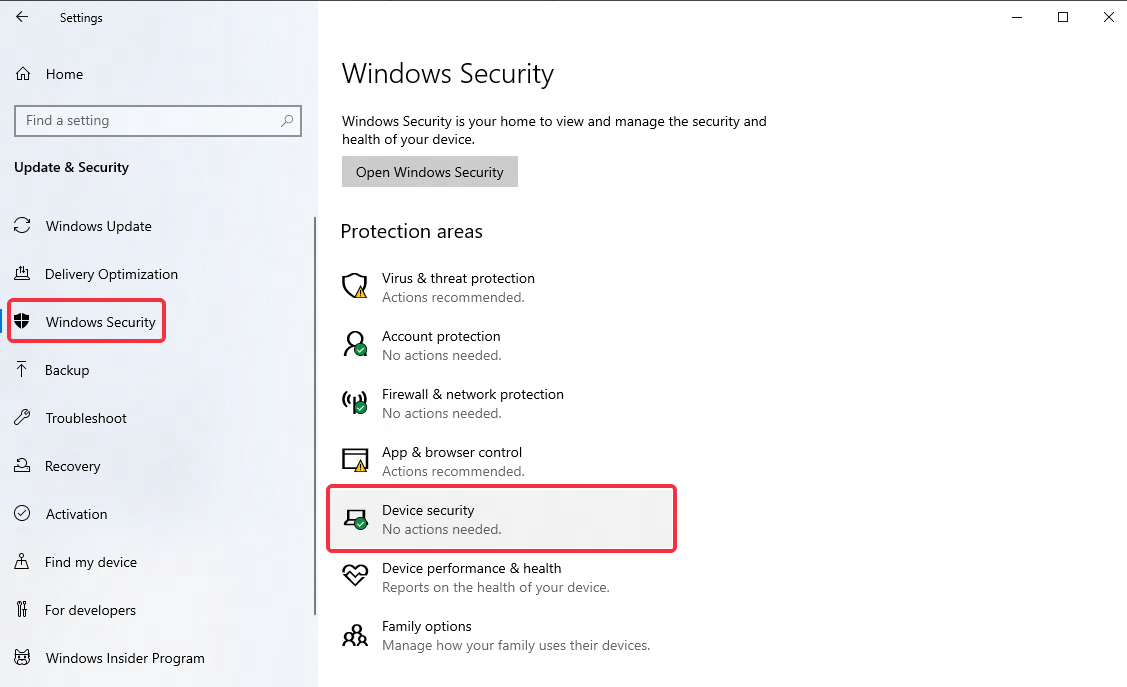
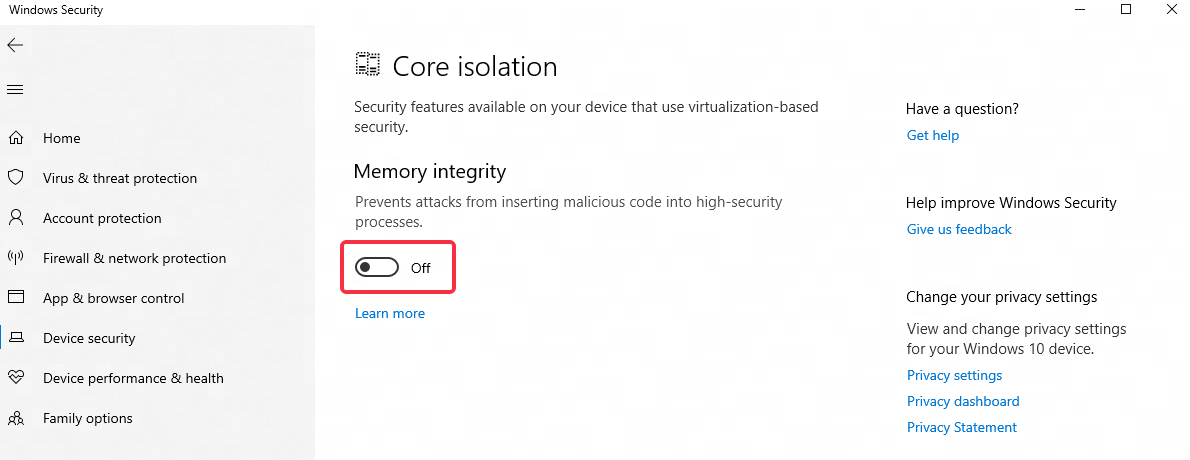
Go to Windows Settings - Update & Security - Windows Security - Device Security - Core Isolation Details and turn off Memory Integrity;
2. How to disable Hyper-V/VBS?
2.1 Run the file to automatically disable Hyper-V/VBS
Click to download the file >> Automatically disable Hyper-V/VBS.
After the download is complete, right-click, run the program with administrator rights and then restart the emulator. If the automatic turn-off is not successful, please try the manual method below.
2.2 Disable Hyper-V/VBS manually
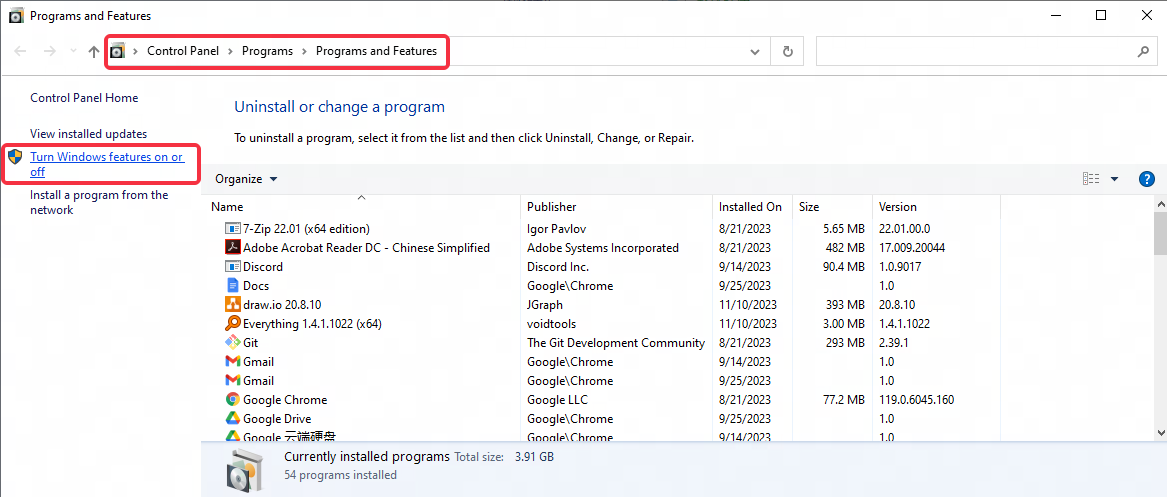
Step 1: open the interface of "This PC", enter in the address bar: Control Panel\Programs\Programs and Features, then press Enter to search;
Step 2: click "Turn Windows features on or off";
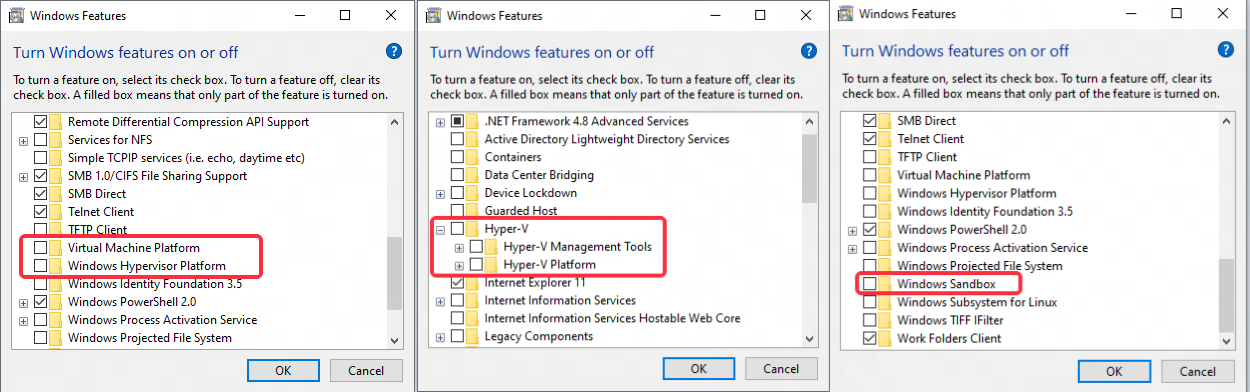
Step 3: check whether there are the following options in the menu: "Hyper-V", "Virtual Machine Platform", "Windows Hypervisor Platform", "Windows Sandbox", uncheck all of them, and restart the computer.
Generally speaking, after restarting the computer, Hyper-V/VBS will be disabled successfully. If not, please follow the steps below:
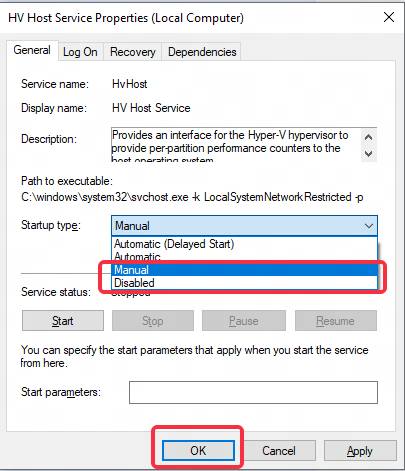
Step 1: right-click "This PC", click "Manage", jump to the interface of "Computer Management" - "Service and Applications" - "Services", find "HV Host Service"

Step 2: Double click "HV Host Service", change the Startup type to "Manual" or "Disable", then click "OK".
If it is still not successful, please confirm whether there is a VMware virtual machine installed. If so, please uninstall and close >> Disable VMware service.
2.3 How to disable Hyper-V/VBS in Windows 11 Home Edition
Method 1:
Step 1: Create a text document and rename it as "Hyper-V.cmd";
Step 2: Enter the following code into the document:
pushd "%~dp0"
dir /b %SystemRoot%\servicing\Packages\*Hyper-V*.mum >hyper-v.txt
for /f %%i in ('findstr /i . hyper-v.txt 2^>nul') do dism /online /norestart /add-package:"%SystemRoot%\servicing\Packages\%%i"
del hyper-v.txt
Dism /online /enable-feature /featurename:Microsoft-Hyper-V-All /LimitAccess /ALL
Step 3: After saving the document, right-click the document and run the file as administrator. A command window will appear. After the installation is complete, enter Y to restart the computer;
Step 4: After restarting the computer, Hyper-V is successfully installed.
Now use the emulator's built-in disable function to try to disable Hyper-V, or refer to the [Manually disable Hyper-V/VBS] tutorial above to try.
Method 2:
Step 1: right-click the Start menu - Windows PowerShell (Administrator), enter: Disable-WindowsOptionalFeature -Online -FeatureName Microsoft-Hyper-V-All, then click Enter
Step 2: if still not successful, enter cmd in the taskbar search box, click run as administrator, enter: bcdedit /set hypervisorlaunchtype off, and click Enter.
If the above method still cannot help you disable Hyper-V/VBS in Windows 11 Home Edition, it is recommended to contact computer after-sales or go to the official Microsoft Community website for consultation. You can also upgrade to Windows 11 Professional Edition to solve the problem.
End of Article