
Best Android Emulator for Destiny: Rising – Why MuMuPlayer Is the Top Choice
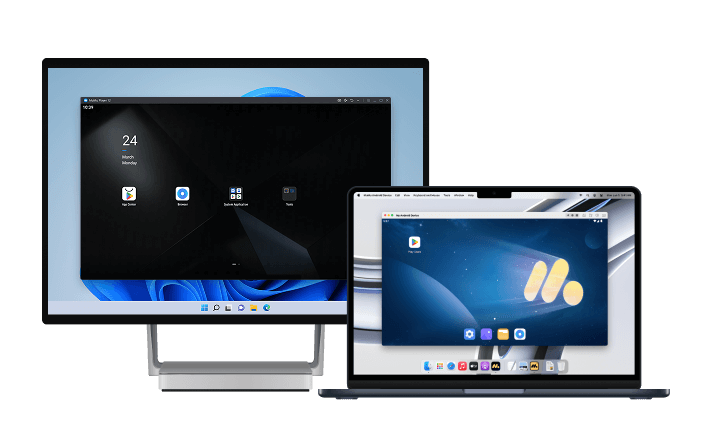
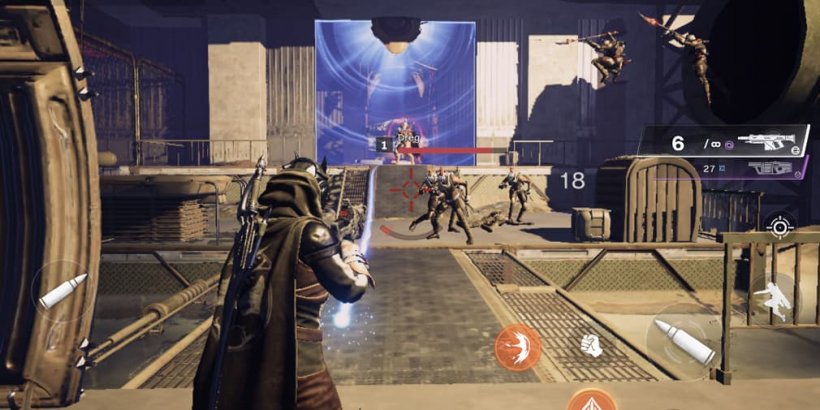
With its dynamic gunfights, immersive maps, and competitive PvP action, players need precision, fast reactions, and stable performance to truly dominate. While it’s designed for mobile, many players find that small screens and touch controls limit the experience. That’s why playing Destiny: Rising on PC with an Android emulator is the smarter way to play.
But with so many emulators out there, which one should you choose? If you want the best Android emulator for Destiny: Rising, the answer is clear: MuMuPlayer, the official partner emulator of the game. Unlike generic emulators, MuMuPlayer offers tailored optimizations, exclusive rewards, and advanced features designed specifically to give Destiny: Rising players the edge they need.
For more insights, you can also check out our other guides: Destiny: Rising PC (Emulator) Installation and Settings Guide. This article provides additional ways for players to enhance their overall gaming experience and take full advantage of MuMuPlayer’s features.
Why Play Destiny: Rising on PC with MuMuPlayer?
Switching to PC with MuMuPlayer doesn’t just make the game bigger — it makes it better:
- Immersive Big-Screen Action – Spot enemies faster, enjoy higher detail, and see the entire battlefield clearly.
- Precise Controls – Customize your keyboard & mouse or connect a controller for accurate shooting.
- Smooth Performance – Push frame rates up to 240 FPS for ultra-responsive gameplay.
- No Mobile Restrictions – Play without worrying about battery drain, overheating, or calls interrupting you.
- Multi-Instance Flexibility – Run multiple game accounts simultaneously for farming, testing, or leveling.

Why MuMuPlayer Is the Best Emulator for Destiny: Rising
While there are several Android emulators available, only MuMuPlayer offers the perfect combination of performance, features, and official support for Destiny: Rising. Here’s what sets it apart:
Official Partnership Rewards
MuMuPlayer is the official partner emulator for Destiny: Rising, which means emulator users get access to emulator-exclusive rewards and short-window events that aren’t available on plain mobile installs. Typical examples are cosmetic bundles, resource packs, starter items, and time-limited sign-in bonuses reserved for MuMuPlayer users. The MuMuPlayer site explicitly points readers to the emulator’s Game Zone / sidebar for current exclusive codes and states redemption rules.
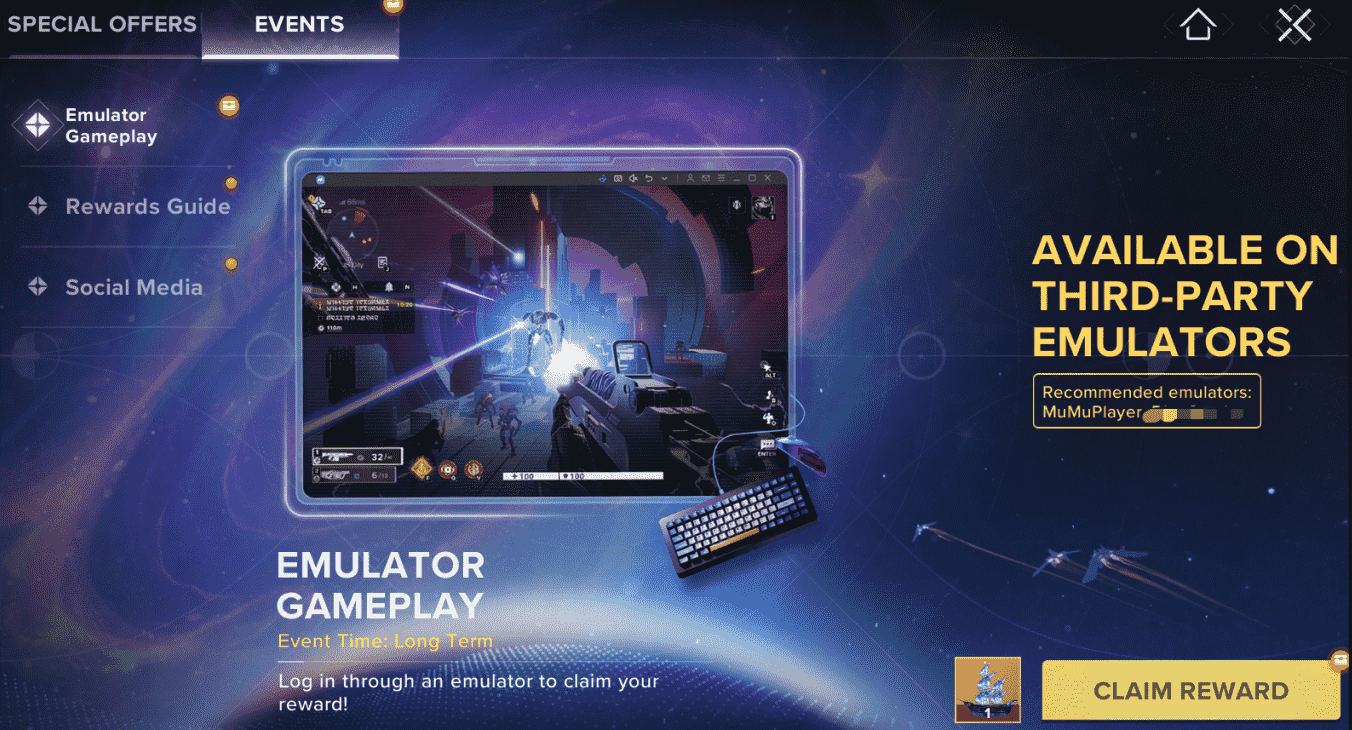
Practical steps to claim:
- Launch Destiny: Rising inside MuMuPlayer.
- Open the MuMuPlayer Game Zone / emulator sidebar where MuMuPlayer publishes the current emulator code. Copy the code immediately.
- In the game go to Settings → Other → Redeem Code and paste the code; confirm to receive items.
Pro tips:
- Check MuMu’s Game Zone every time you open the emulator — codes rotate frequently and some rewards are limited to the first batch of players.
- If a code says “first 1,000 users,” redeem as soon as you see it — these run out quickly.
Deep Game Optimization
MuMuPlayer includes game-specific optimizations tuned for Destiny: Rising: input mapping is optimized for low input latency, rendering pipelines are tuned for stable frames under load, and the emulator provides accessible device/performance controls so you can match your PC hardware to the game’s needs. These settings aren’t generic — the MuMuPlayer guide calls out targeted optimization for Destiny: Rising to preserve the “authentic shooting feel.”
Practical settings to minimize input lag and maximize responsiveness:
- Renderer: Set MuMu’s Graphics Renderer to Vulkan (better throughput on modern GPUs).
- CPU / RAM allocation: Allocate 6–8 performance cores (or “8+” if your CPU supports it) and 8 GB RAM (or more) for a smooth experience. On systems with mixed core types (P/E cores), assign the performance cores first.
- Storage: Install MuMuPlayer and Destiny: Rising on an SSD — install on HDD can cause stutters/lag.
- Emulator Performance Profile: Choose “High Performance” or a custom profile with higher CPU/RAM for the Destiny instance. Restart MuMuPlayer after saving these settings for them to take effect.
In-game tweaks to pair with emulator settings:
- Calibrate aim sensitivity and ADS (aim down sights) sensitivity inside Destiny: Rising after changing emulator framerate/renderer — aim feels different at 60 vs 120 FPS.
- Use MuMu’s keymapping to bind aim and fire properly (see Section 5 below) so the emulator input pipeline remains simple (no extra overlays that might add latency).
Why this matters: in shooters, every 10–20 ms of lag can change outcomes in duels — MuMu’s targeted tuning and recommended allocations reduce these delays so your mouse/keyboard aim translates cleanly into in-game shots.
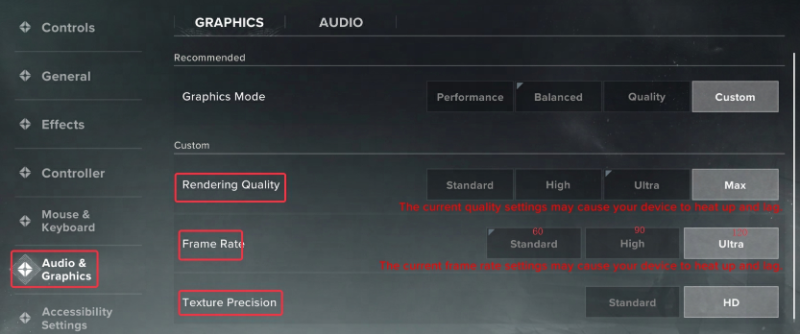
High FPS & Enhanced Graphics
MuMuPlayer supports high-FPS large-screen play and encourages players to use higher frame rates and HD textures for smoother, clearer combat. The official guide mentions high-FPS support and recommends matching the emulator/game settings to your monitor (it also explains when to limit frame rates for stability).
- Frame rate target: If your monitor/PC supports it, shoot for 120 FPS in the game as a practical sweet spot (the MuMuPlayer guide notes 120 FPS as the in-game Ultra target and stresses matching your monitor refresh rate to avoid wasted cycles). If you have a 240 Hz monitor and the emulator/GPU can sustain it, you can experiment with higher rates but ensure the game actually allows it and the rest of your pipeline (GPU, drivers) can keep up.
- Resolution: Use 1920×1080 for best performance/clarity on typical monitors; step up to 2K if your GPU can handle it.
- HD Textures: Only enable HD textures when your GPU has ≥4 GB VRAM — otherwise you risk crashes and performance issues. The guide explicitly warns that HD textures require more VRAM.
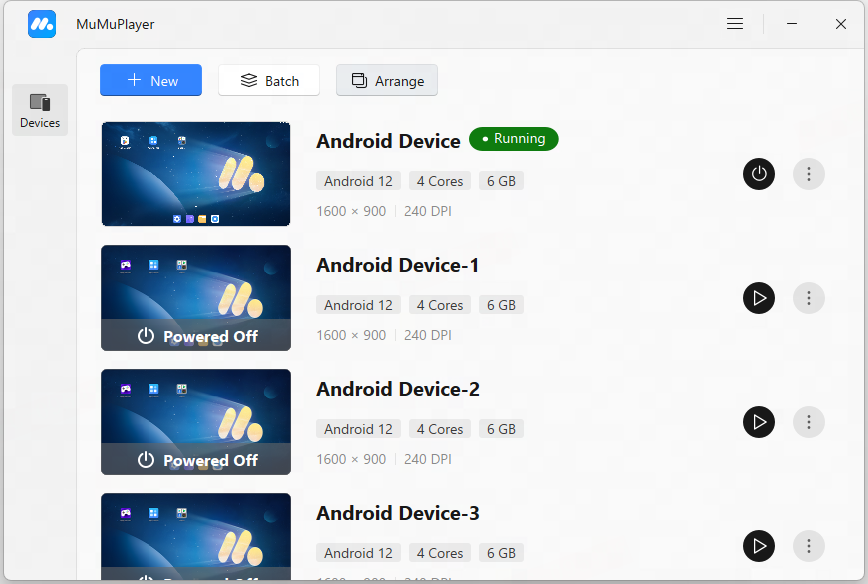
Multi-Instance Functionality
MuMu’s Multi-Instance Manager is a full manager that lets you create, clone, copy, batch-start/stop, backup and configure multiple emulator instances — all from one UI. This is perfect for Destiny: Rising players who want to farm resources on one account while testing builds on another, or manage multiple region accounts simultaneously.
How to create and run instances (step-by-step):
- Open MuMuPlayer and click the Multi-Instance Manager (icon usually looks like two windows or labeled “Multi-drive”).
- Click + New to create a fresh Android instance (or Copy/Clone an existing one to preserve apps/data).
- For each instance, click Settings → Performance to adjust CPU cores, RAM, and graphics strategy. For many simultaneous instances, use “less resource usage” for secondary instances.
- Start instances individually or select multiple and Batch Start to launch them together.
Use cases that matter to Destiny players:
- Run a main PvP account on high settings and a second account farming events/raids on low settings simultaneously.
- Clone a pre-configured instance to test different loadouts/builds without affecting your main account.
Customizable Keymapping & Controller Support
MuMu’s keymapping editor is mature and flexible — it supports single-key binds, click buttons, D-pad emulation, multi-key macros, and community/cloud profiles you can import. You can assign any touch control to keyboard/mouse or gamepad input, and MuMuPlayer supports native controller modes for gamepads. The docs describe double-click placing of keys, right-click menu for extra controls, macro creation, and cloud mapping schemes.
Built-in Recording & Screenshots
MuMuPlayer includes a built-in screen recording tool and screenshot functions so you don’t need third-party capture software. The recorder supports floating controls, pause/resume, audio selection, and saves recordings automatically with thumbnails for quick review. You can also set output quality, FPS (30–60 for recorder), and output folder.
Recording tips for highlight reels:
- Record at 60 FPS if your machine can handle it (set in recorder options) for smooth playback; otherwise 30 FPS is fine for social clips.
- Save files to an external folder if you record lots of clips to avoid filling the system drive.
- Use the floating recorder for instant clips of clutch moments — you’ll have a thumbnail ready to trim and upload within seconds.
How to Play Destiny: Rising on PC with MuMuPlayer?
Setting up Destiny: Rising on MuMuPlayer is simple. To maximize performance, follow these steps:
- Download & Install MuMuPlayer – Get the latest version from the official website. Installing on an SSD is recommended for faster load times.
- Adjust Emulator Settings –
- Performance: Assign 4 CPU cores and at least 4GB RAM (higher if available).
- Graphics: Enable Vulkan Renderer, depending on your GPU.
- FPS: Set frame rate to 120–240 FPS for ultra-smooth shooting.
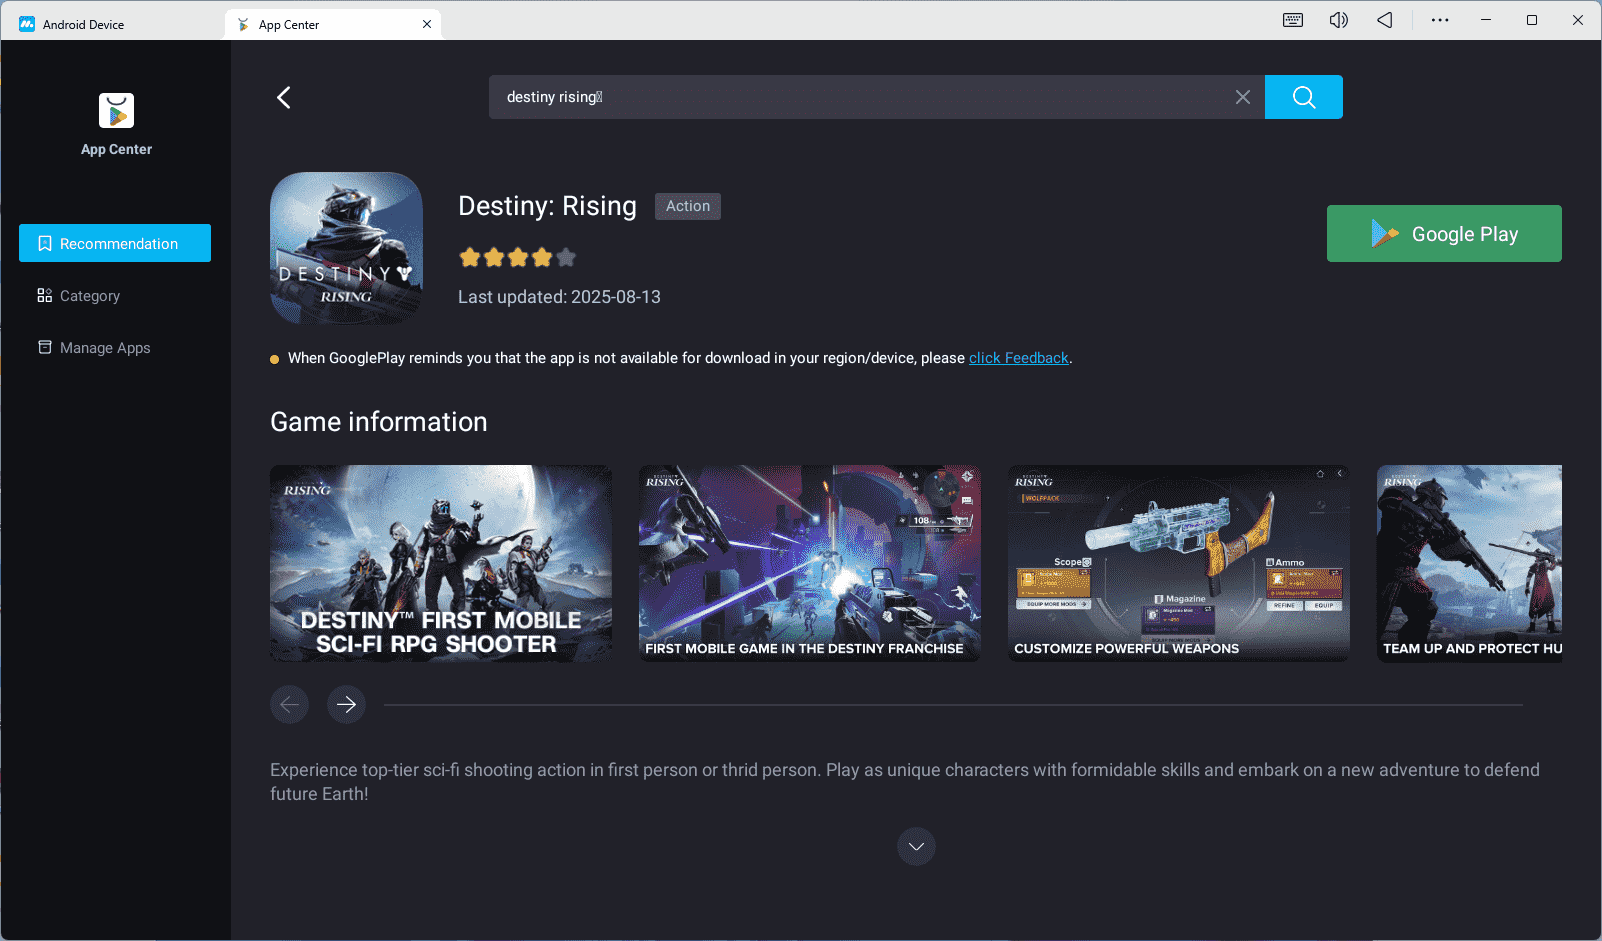
- Search & Install Destiny: Rising – Use the built-in store to download and install the game.
- Customize Controls – Open the keymapping tool to assign shooting, aiming, and movement keys. Adjust sensitivity to match your playstyle.
- Start Playing – Log in with your account and enjoy the optimized PC gameplay.
Frequently Asked Questions About Playing Destiny: Rising on MuMuPlayer
Q: Can I use other emulators to play Destiny: Rising?
A: For the best experience and optimal performance, we highly recommend using MuMuPlayer, as it is specifically optimized for Destiny: Rising to ensure smooth and stable gameplay.
Q: What should I do if I experience screen glitches or lag?
A: If you encounter issues like screen flickering or sudden lag, it might be due to VRAM overload. Here are a few things you can try:
- Close background applications that use high amounts of VRAM, such as web browsers (especially those with audio/video content), other games, or resource-heavy apps.
- In the game's texture settings, set the quality to Standard and reduce the overall graphics quality to maintain smoother performance.
- Restart the game to clear up any temporary performance issues.
Q: What if I'm using an AMD GPU and experience performance issues?
A: AMD GPUs may have compatibility issues with Destiny: Rising, leading to performance problems like lag or even GPU driver crashes. If you are using an AMD graphics card and experiencing these issues, you may need to adjust the graphics settings in the emulator or consider updating your graphics drivers for better stability.
Q: The emulator is not responding, or the game is crashing. What should I do?
A: If you're facing issues like the emulator not responding, crashing, or becoming unresponsive, try the following:
- Restart the emulator or even your computer to resolve any temporary issues.
- If the problem persists, try adjusting the virtual machine settings in the emulator to improve stability.
MuMuPlayer - The Best Emulator for Destiny: Rising
When it comes to choosing the best Android emulator for Destiny: Rising, MuMuPlayer clearly wins. It’s not just another emulator — it’s the official partner of the game, offering exclusive rewards, tailored optimizations, multi-instance tools, 240 FPS gameplay, and seamless cross-platform support.
Whether you’re a competitive PvP player, a casual shooter fan, or someone who wants to farm efficiently with multiple accounts, MuMuPlayer is the ultimate way to play Destiny: Rising on PC.
Download MuMuPlayer today and experience Destiny: Rising with the smoothest, most powerful, and most rewarding setup available!
End of Article